
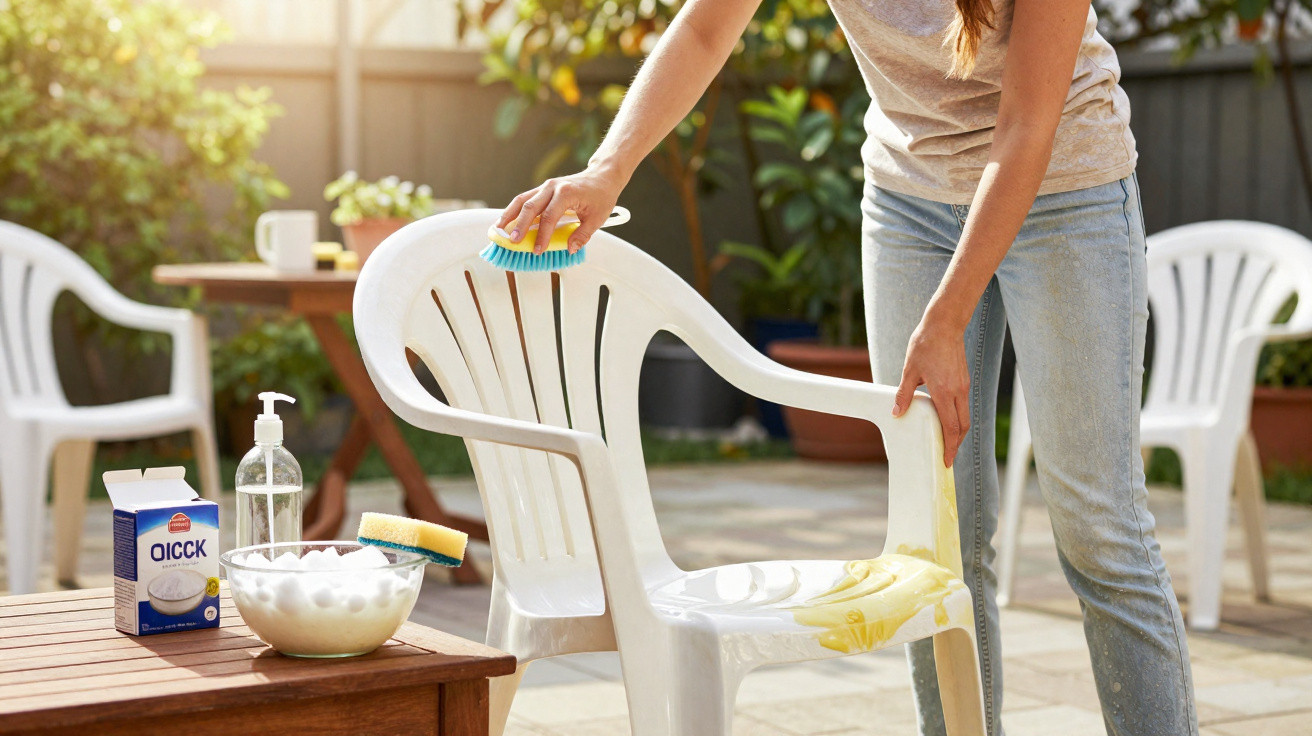
The plastic chairs that once looked bright are now dull and yellow, the table is dotted with stains, and the entire set may appear ready for the tip. However, an inexpensive cleaning method using products already found in most homes can frequently restore tired plastic and give it another useful life.
Why plastic garden furniture fades, yellows and becomes tired-looking
Outdoor plastic furniture has to withstand blazing sunshine, winter frosts, downpours, traffic pollution, barbecue smoke and continual dust. In time, this combination inevitably affects its appearance.
Ultraviolet (UV) sunlight gradually harms the plastic’s outer surface. Its top layer becomes a little rough and porous, allowing grime, pollen and soot to lodge in it. As a result, furniture that was once fresh and bright can become grey, blotchy or yellowed.
White PVC is particularly likely to develop a cream or yellow cast. Coloured plastic tends instead to lose intensity: rich greens and blues can become pale and faded when the material was not UV-treated during manufacture.
“Sunlight doesn’t just fade plastic – it changes the surface, making it grab onto dirt, stains and pollution far more easily.”
Other materials also deteriorate, although differently. Metal furniture may rust once its protective finish breaks down. Wood can turn silvery and coarse, requiring regular oiling and light sanding to remain appealing. Natural rattan does not cope well with persistent rain or direct sunshine, and often cracks or breaks within a few seasons.
Provided it remains structurally sound, plastic is still among the simplest materials to restore. If the chair legs have not cracked and the seat is not brittle, there is generally much to try before throwing the furniture away.
A two-step homemade method for reviving dull plastic
A frequent error is to use aggressive chemicals or abrasive scourers on yellowed plastic immediately. This may scratch the finish and cause it to deteriorate more quickly. A more careful, gentler process is more effective.
Step 1: remove loose and surface dirt
First, use a soft brush or broom to clear away leaves, cobwebs and loose debris. Removing this initial layer stops mud simply being spread across the furniture.
Next, make up a bucket of warm water with a squirt of mild washing-up liquid. Wash all areas with a soft cloth or non-scratch sponge, including the undersides of chair arms and seat edges, where dirt often accumulates. Rinse with fresh water afterwards to remove every trace of soap.
“A thorough wash with warm, soapy water is the foundation: the brighter-cleaning mix only works properly on a surface that’s already free of grease and mud.”
Step 2: brighten plastic with vinegar and bicarbonate of soda
When the furniture is clean but still slightly damp, continue with the brightening treatment. This stage uses a straightforward homemade mixture.
Add the following to a spray bottle:
- 500 ml of warm water
- 1 tablespoon of white vinegar
- 2 tablespoons of bicarbonate of soda (baking soda)
- A small squeeze of washing-up liquid
Gently shake the bottle until the bicarbonate has dispersed evenly. Apply the mixture liberally to the plastic, treating one section at a time.
Rub in circular motions using a soft sponge. The bicarbonate’s mild abrasive action helps release embedded dirt, while vinegar deals with limescale films and older deposits. Allow the solution to remain for several minutes before rinsing it away thoroughly with clean water.
White furniture with especially persistent marks, including leaf stains, pollution marks or ingrained dirt, may occasionally require a stronger option. A cleaning “clay stone”, or comparable product typically containing mineral powder, soap and glycerine, can be useful. Use a damp sponge to apply it, rub gently and rinse thoroughly. With coloured plastic, test a more abrasive cleaner on an inconspicuous area first, ensuring it does not fade or dull the colour.
When to repair or bin plastic garden furniture
Inspect the structure before spending time on cleaning
Before committing an afternoon to scrubbing, inspect every item carefully. A cracked chair leg, an overly flexible seat or deep splits in the plastic could mean that the furniture may give way under a person’s weight.
“If the plastic is cracked or brittle, cleaning won’t fix the risk: in that case, the safest option is to let it go.”
Small cosmetic flaws are another matter. Minor scratches, patchy colouring and a chalky texture can often be improved. Fine-grit sandpaper, at around 120 grit, may be used very gently to smooth the surface. Sand lightly in one direction only, and remove all dust before painting.
Paint worn plastic rather than replacing it
Furniture that remains sturdy but still appears worn after cleaning can be given a new lease of life with spray paint or specialist plastic coatings. Such paints generally include additives that adhere to smooth synthetic materials, as well as UV-resistant pigments.
For the best finish, clean the item first, allow it to dry completely, sand it very lightly and then use thin, even coats. A darker colour may conceal yellowing that cannot be fully removed and can also update an old-fashioned style.
Keeping your garden set bright for more than one season
A little forethought can greatly increase the lifespan of garden furniture. When buying, look on the label for wording such as “UV-stabilised” or “colour in the mass”. These indicate that the colour runs through the material instead of merely coating the surface, and that additives have been used to slow damage from sunlight.
Storage and everyday use also have a substantial effect. The following habits can help:
- Use a breathable cover over the furniture throughout autumn and winter.
- Put stackable chairs in a shed, garage or beneath a dry balcony when they are not required.
- Wash away bird droppings, tree sap and barbecue grease promptly, before they become set in.
- During summer, give the set a brief wash with soapy water every few weeks.
- Do not use oily polishes, as they may leave the plastic sticky and draw in more dirt.
Despite common suggestions, kitchen oils and “miracle” shine sprays are not suitable for plastic. Although they can look effective initially, they create a greasy coating that holds dust and may speed up yellowing over time. Plastic generally ages better when it is clean, dry and shielded from the strongest sun.
What happens to the plastic surface
PVC and polypropylene are used to make many garden chairs. Both are lightweight and comparatively low-cost, but each reacts to oxygen and light. UV radiation breaks down some chemical bonds at the surface, causing slight chalking and a rough texture that can be felt by hand.
The homemade vinegar and bicarbonate mixture does not undo this chemical ageing. What it does remove is the accumulation caught in the newly roughened surface: pollution particles, soot, fine dust and mineral deposits left by rainwater. Once this layer has gone, furniture can look much closer to its original colour, even though the plastic beneath has aged somewhat.
Using the same method on other plastic surfaces
This affordable cleaning approach can also be helpful elsewhere around the home. Plastic window frames, exterior storage boxes, children’s plastic tables and certain patio accessories may often be refreshed with warm soapy water, followed by the vinegar and bicarbonate spray.
As with garden furniture, begin with a small test in a concealed place. Some printed decorations and glossy finishes are more delicate, and may need no more than mild soap. Do not use this technique on car bodywork or lacquered surfaces, as even mild abrasives can leave noticeable scratches.
What can go wrong and how to prevent it
There are several potential problems to consider. A harsh scourer can create lasting scratches that show up in the light. Vinegar must never be mixed with bleach, even during intensive cleaning, because the combination releases toxic fumes.
On furniture that is very old or badly damaged by sun exposure, cleaning may make the extent of deterioration more obvious. Once the dirt has been removed, a chair can appear worse because the plastic below is severely chalked or unevenly coloured. In these circumstances, painting it or choosing to recycle it may be more practical.
For many garden sets, however, the first thorough clean of the year, paired with a simple homemade brightening mixture, can turn furniture that seemed destined for the bin into a practical and even attractive part of the patio once more.
Comments
No comments yet. Be the first to comment!
Leave a Comment