
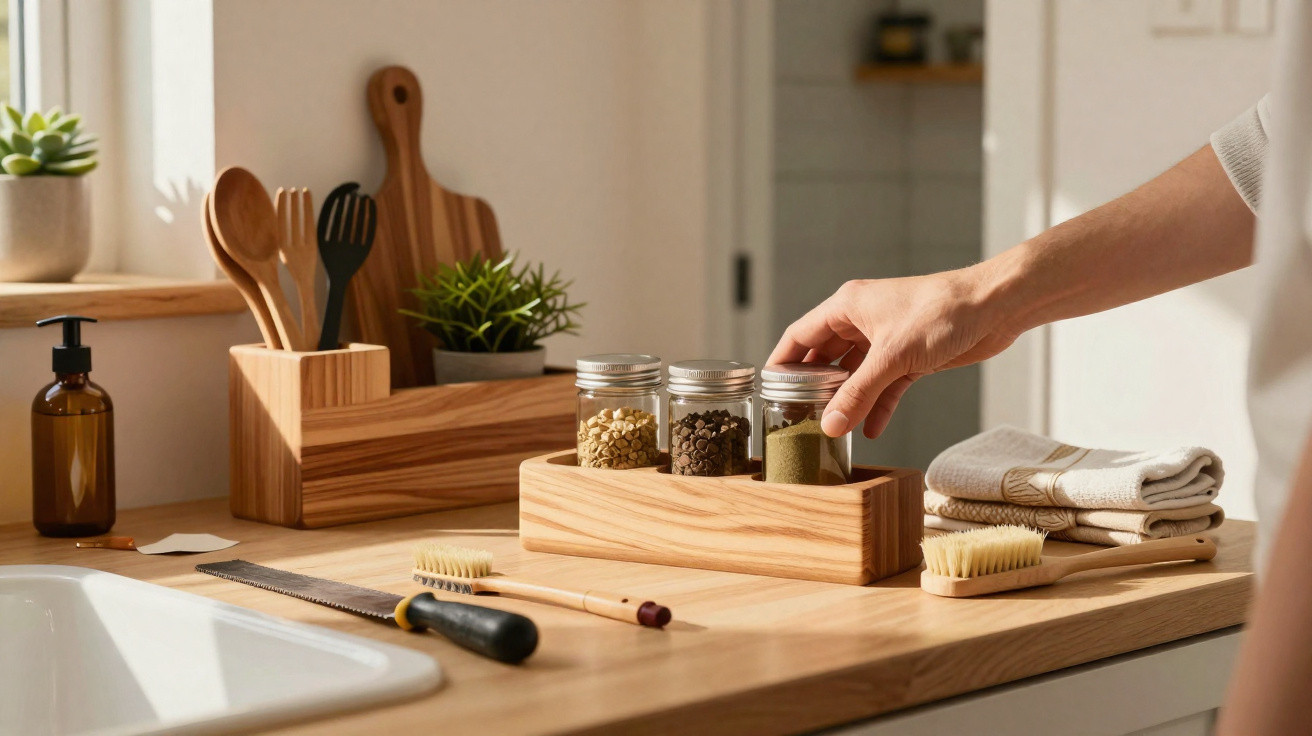
Oily bottles, coffee capsules, scraps of paper – and no room anywhere: a few leftover boards from the cellar can make a worktop feel newly organised.
Many kitchens, home offices and bathrooms look cluttered not because they lack storage, but because the available space is being used poorly. Meanwhile, old shelving boards, pallet offcuts and pieces left over from the last furniture project often pile up in the cellar. These modest timber remnants can make a real difference, turning a crowded surface into a well-organised workspace.
Why leftover wood makes an ideal basis for organisers
Using reclaimed timber costs nothing, conserves resources and adds warmth to a room. Unlike plastic storage boxes, wood suits almost every interior style, from a country kitchen to an industrial loft. Once you have seen how a small wooden riser can make an entire surface feel “calm”, you will look at organising your workshop differently too.
Discarded boards can become bespoke organisers tailored precisely to your own kitchen, desk or bathroom countertop.
Leftover wood offers another benefit: there is no need to worry excessively about a mistaken cut. That takes the pressure out of the project and makes DIY more approachable, even for beginners with limited experience.
Choosing and preparing the right wood
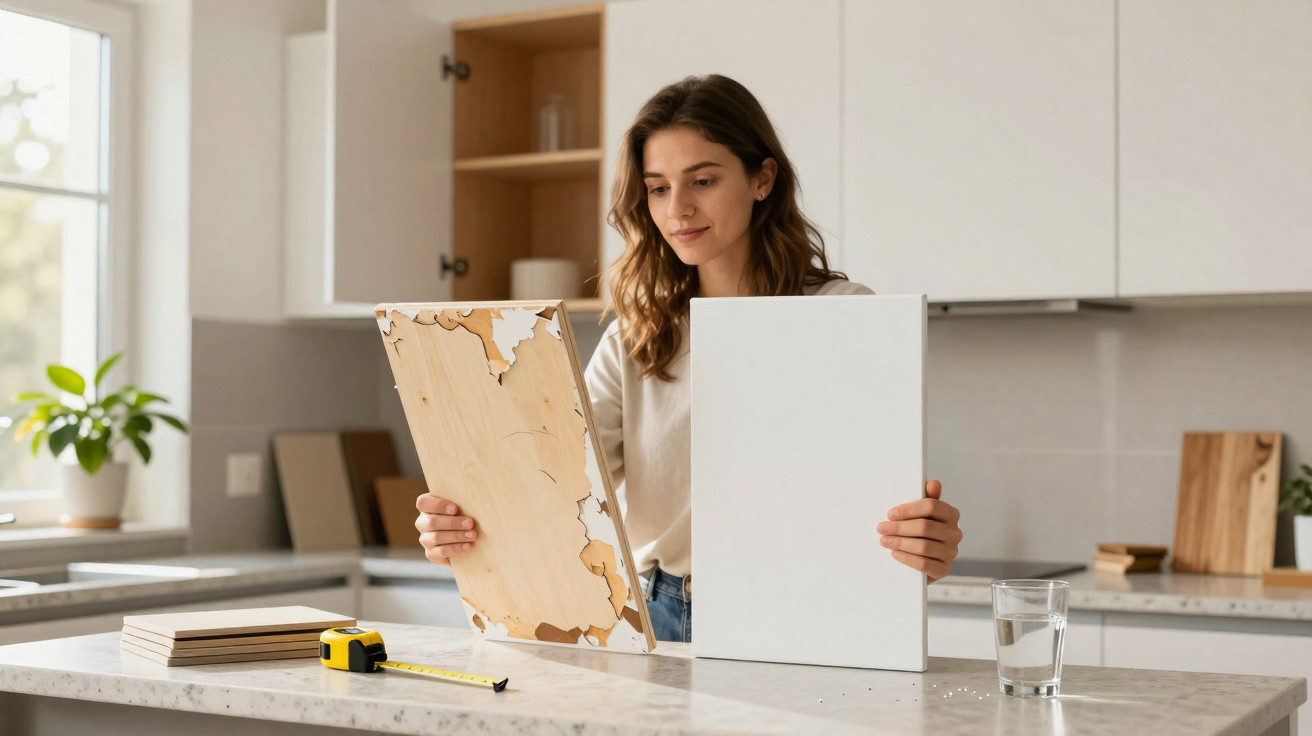
Not every salvaged piece is suitable for every setting. It is worth inspecting the material particularly carefully when food or moisture is involved.
Suitable types of wood for kitchen and bathroom projects
- Clean offcuts from solid-wood furniture
- Undamaged cuts of plywood or birch ply
- Dry leftover floorboards or parquet pieces
- Pallet boards without major cracks or questionable coatings
Avoid pressure-treated timber, strongly scented outdoor boards, and parts with flaking old paint if the finished item will be used in a kitchen or bathroom. Hygiene and peace of mind matter here.
The basic process is almost always the same: brush the wood thoroughly, allow it to dry properly, sand it with a medium-grit abrasive, then smooth it with a fine grit. This can transform a grey-looking board back into an attractive piece of timber.
Protecting the surface: varnish, oil or paint?
Moisture is always a consideration in kitchens and bathrooms. A durable seal helps prevent staining and swelling.
- Acrylic paint with a clear topcoat: easy to wipe clean and available in many colours
- Hardwax oil: brings out the grain and gives a more natural finish, but needs renewing
- Clear polyurethane varnish: suited to heavily used surfaces or splash-prone areas
If you are unsure, try the finish on a small offcut first. It will show how much the colour darkens and whether the resulting surface feels smooth enough.
14 clever projects to clear every worktop
The principle behind every project is simple: group belongings into “families”, make use of vertical space, and assign clear zones. This keeps surfaces uncluttered while ensuring everything remains close at hand.
- Raised bottle shelf for oil, vinegar and sauces – a narrow board on feet, positioned against the back wall.
- Portable box for cooking utensils with a handle, for wooden spoons, whisks and spatulas.
- Slim spice rail mounted on the wall or along the back of the worktop.
- Vertical chopping-board holder, allowing boards to dry upright without taking up space.
- Capsule or coffee-pad organiser beside the coffee machine, made to fit your preferred brand exactly.
- Storage box for coffee filters and napkins to organise the breakfast area.
- Mini tray for hand soap and washing-up liquid beside the sink, slightly raised so nothing sits in water.
- Pen and note holder for the home office, with room for paper clips and USB sticks too.
- Monitor riser with a compartment for a keyboard and notebook – more ergonomic as well as tidier.
- Charging station for a smartphone and tablet with routed cable channels.
- Wall-mounted holder for post and bills in the hallway or by the desk.
- Tray for toiletries in the bathroom, keeping creams and bottles together.
- Wooden dish for keys and small items placed directly by the front door.
- Small book crate for favourite books or cookbooks on a sideboard or worktop.
Anyone who divides their surface into functional islands – a coffee zone, cooking zone and washing-up area – will see scattered items suddenly become structured.
Tailor each project to your space and routine
Before making the first cut, reach for the tape measure. How deep is the worktop in reality? How much clearance is there below the wall cupboard? Is the monitor taller than expected? Knowing these dimensions prevents awkward trimming later.
A quick pencil sketch is useful for planning compartments, drill holes and handles. With a charging station in particular, the location where cables leave the wood matters, as does whether the plug can fit through.
Straightforward construction, even without a professional workshop
Most of the 14 ideas use only a few straight boards. In many cases, a handsaw, cordless drill-driver, wood glue and a handful of screws are all that is needed. Those with very few tools can have timber cut to size at a DIY shop.
- Join surfaces with glue, clamp them in place, then secure them with screws
- Soften edges with sandpaper to prevent splintering
- Drill holes for finger grips or cables before applying varnish
Each completed project builds confidence, and before long every strip of wood in the cellar can look like a possible answer to a small everyday problem.
How wooden organisers change the feel of a home
Organising systems made from leftover wood do more than improve appearance: they bring order to routines. Starting the morning in a sorted kitchen means coffee capsules and favourite mugs can be found without looking. Tidy desks make working from home easier because piles are no longer constantly in view.
Wood also feels warmer than metal or plastic. In particular, a few oiled boards on the worktop can restore a sense of comfort to a cool new-build kitchen. Small details such as recessed handles, bevelled edges or a strip of colour help the organisers look like consciously chosen accessories rather than temporary solutions.
A sustainable benefit and useful additions
Using reclaimed timber saves both money and waste. Retired shelving boards remain in circulation instead of ending up as bulky waste. This not only protects resources, but is also enjoyable because every organiser carries a small story: “This used to be our old bookcase”.
Anyone who enjoys projects like these can take the idea further by planning combinations: a continuous wooden shelf running from the spice area to the oil rack, or a matching hallway set comprising a key tray, post holder and coat rail. Even simple hook rails or magnetic knife boards made from leftover wood complete the look and make use of every nook.
One point remains important for every project: secure screw fixings, neatly sanded edges and a surface that can be cleaned easily. Then these handmade organisers can last for many years, while worktops can finally serve their intended purpose: providing room for cooking, working, making and living.

Comments
Photovoltaik forderung kiel
[url=https://moypvdom.com/]Photovoltaik Systeme
[/url]
• От 220 000 рублей — балочный условно-съёмный протез на имплантах https://adentalab.ru/
• Акрил — лёгкий пластик, сохраняет форму конструкций https://adentalab.ru/
Изготовление зубных протезов — это процесс создания ортопедических конструкций, замещающих утраченные зубы https://adentalab.ru/
Для подбора и изготовления протезов необходимо обратиться к стоматологу-ортопеду https://adentalab.ru/
Протезы изготавливаются специалистом по зубному протезированию (зубным техником) в соответствии с инструкциями стоматолога и результатами сканирования https://adentalab.ru/
1 https://adentalab.ru/
Снятие слепков и подготовка https://adentalab.ru/
После первичного осмотра стоматолог снимает слепки с обеих челюстей пациента https://adentalab.ru/
В лаборатории по этим слепкам создаётся гипсовая модель челюстей пациента https://adentalab.ru/
• Металлокерамика — сочетание металла и керамики: металл используется в качестве каркаса, а сверху придаёт форму и цвет коронке — керамика https://adentalab.ru/
Выбор протезов и материалов, из которых они будут изготавливаться, осуществляет врач, сочетая своё решение с мнением пациента https://adentalab.ru/
Калибровка средств измерений – совокупность операций, выполняемых в целях определения действительных значений метрологических характеристик и метрологической пригодности тех средств измерений, которые применяются вне сферы государственного регулирования обеспечения единства измерений https://analyztepla.ru/katalog-izmeritelnykh-priborov/vibrometry/vibro-tcentr/vibro-vision-2-analizator-vibrosignalov-vibroanalizator-s-dopolnitelny
При калибровке определяются действительные значения единиц величин, оцениваются значения неопределенности измерений, составляется бюджет неопределенности http://analyztepla.ru/katalog-izmeritelnykh-priborov/takhometry-stroboskopy/megeon/taxometr-megeon-18012
В наличии: Под заказ https://analyztepla.ru/poverka/poverka-dinamometricheskogo-klyucha
+ восстановление маркировки и знака утверждения типа (при необходимости);
По сути, калибровка и поверка отличаются друг от друга лишь тем, что при поверке подтверждается соответствие требованиям, а при калибровке определяются действительные метрологические характеристики https://analyztepla.ru/katalog-izmeritelnykh-priborov/gazoanalizatory/sensory-dlya-gazoanalizatorov/sensory-kisloroda-o2/sensor-kisloroda-bez-svincza-lfo2-a4
Заметили ошибку? Выделите текст ошибки, нажмите Ctrl+Enter, отправьте форму https://analyztepla.ru/katalog-izmeritelnykh-priborov/raskhodomery/streamlux/ultrazvukovoy-raskhodomer-streamlux-sls-700p-pro-160-4
Мы постараемся исправить ее https://analyztepla.ru/katalog-izmeritelnykh-priborov/gazoanalizatory/elan-elan-eko-intekh/gazoanalizatory-portativnye-serii-elan-plyus/portativnyy-gazoanalizator-elan-plyus-o2-2-3-4-2-2-3
Гарантия: Не указано https://analyztepla.ru/katalog-geodezicheskogo-i-navigatcionnogo-oborudovaniya/niveliry-opticheskie/rgk/komplekt-opticheskij-nivelir-rgk-n-38-shtativ-s6-n-rejka-amo-s5
Пектины;
Пищевые волокна (клетчатка);
Непатогенные разновидности Bacillus (В https://пик-крым.рф/product/smaragdus/
subtilis);
К пребиотикам относятся следующие органические соединения и компоненты пищи:
Все без исключения лекарства компании «Буарон», в том числе и монокомпонентные препараты, имеют регистрационное удостоверение лекарственного средства и соответствуют всем требованиям Министерства здравоохранения РФ, а само использование гомеопатических средств регулируется Приказом №335 от 29 https://пик-крым.рф/product-category/mono/l/lg/
11 https://пик-крым.рф/product/antistress/
95 г https://пик-крым.рф/product/platanus-occidentalis/
«Об использовании метода гомеопатии в практическом здравоохранении» МЗ РФ https://пик-крым.рф/vrachi-gomeopaty/orlova-m-s/
Непатогенные разновидности Enterococcus (Enterococci faecium, Е https://пик-крым.рф/product-category/sets/schuessler/
salivarius);
Виды
• Акрил — лёгкий пластик, сохраняет форму конструкций https://adentalab.ru/
• Несъёмные https://adentalab.ru/
Фиксируются на оставшихся зубах или имплантах https://adentalab.ru/
Пациент не снимает конструкцию самостоятельно, врач снимает протез только при необходимости замены или коррекции https://adentalab.ru/
К несъёмным протезам относят коронки, мосты, протезы на имплантах https://adentalab.ru/
Условно-съёмные https://adentalab.ru/
Съёмную челюсть закрепляют на имплантах, такой тип протеза можно снять у стоматолога для проведения необходимых процедур https://adentalab.ru/
Этапы
Процесс изготовления съёмных зубных протезов включает несколько этапов: Первичный осмотр и планирование лечения https://adentalab.ru/
Стоматолог оценивает состояние дёсен, оставшихся зубов (если они есть), а также общий объём работы https://adentalab.ru/
После осмотра составляется план лечения, где указывается тип протеза, материалы, которые будут использоваться, и необходимые этапы работы https://adentalab.ru/
Выбор протезов и материалов, из которых они будут изготавливаться, осуществляет врач, сочетая своё решение с мнением пациента https://adentalab.ru/
Изготовление зубных протезов — это процесс создания ортопедических конструкций, замещающих утраченные зубы https://adentalab.ru/
Для подбора и изготовления протезов необходимо обратиться к стоматологу-ортопеду https://adentalab.ru/
Протезы изготавливаются специалистом по зубному протезированию (зубным техником) в соответствии с инструкциями стоматолога и результатами сканирования https://adentalab.ru/
[b]Топ магазинов даркнета 2026[/b]
Команда dark-net.life публикует актуальный рейтинг рабочих площадок на июнь 2026. Представленные магазины регулярно мониторятся — только рабочие адреса. Добавьте в закладки — ссылки актуальны сейчас.
Ниже представлен обзор сайтов с проверенными адресами. Используйте актуальный адрес рядом с каждой площадкой.
[hr]
[b]1. LoveShop[/b] ★★★★★
Работает стабильно на протяжении нескольких лет — 250+ городов. Сверяйте ссылки на Rutor.
Топ выбор — loveshop, лавшоп, loveshop biz, loveshop tor, loveshop зеркало, loveshop1, loveshop2, loveshop12, loveshop13, loveshop1300, loveshop18, ссылка лавшоп
[b]Зеркало LoveShop:[/b] [url=https://loveshop14.cfd]loveshop1[/url]
[b]Телеграм бот LoveShop: [url=https://t.me/LooveShop_bot]@Loveshop1com_bot[/url][/b]
[b]2. Orb11ta[/b] ★★★★☆
Давно проверенная площадка — широкая сеть доставки. Один из лидеров.
Стабильная работа — orb11ta, orb11ta com, orb11ta vip, orb11ta сайт, orb11ta top, orb11ta org, orb11ta ton, орбита бот, https orb11ta site, orb11ta com сайт вход
[b]Зеркало Orb11ta:[/b] [url=https://orb11ta.sbs]orb11ta ton[/url]
[b]Телеграм бот Orb11ta: [url=https://t.me/Orb11taBIZ_bot]@Orb11taBIZ_bot[/url][/b]
[b]3. Chemical696[/b] ★★★★☆
Специализированный магазин — чемикал 696 биз. Проверен на форумах.
Рекомендуем — chem696, chemical696, chemi696, chemi to, chemshop2 com, chm696 biz, chm1 biz, chemical 696 biz официальный, чемикал 696, чемикал биз, chmcl696
[b]Зеркало Chemical696:[/b] [url=https://chm696.pro]chemical696 официальный сайт[/url]
[b]Телеграм бот Chemical696: [url=https://t.me/Chm6966_bot]@Chm1111_bot[/url][/b]
[b]4. LineShop[/b] ★★★☆☆
Популярный магазин — лайншоп. Проверено редакцией.
Рекомендуем — lineshop biz, lineshop 24, lineshop biz 24, lineshop blz, лайншоп, ls24 biz, ls24 biz официальный, ls24 biz официальный сайт, ls24 махачкала, ls24 blz, ls25 biz, ls24 bis
[b]Зеркало:[/b] [url=https://ls24.sbs]ls24 blz[/url]
[b]Телеграм бот LineShop ls24: [url=https://t.me/ls24_biz24bot]@lineshops_24_biz_bot[/url][/b]
[b]5. TripMaster[/b] ★★★★☆
Стабильный магазин — tripmaster официальный. Рекомендован пользователями.
Рекомендуем — tripmaster to, tripmaster biz, tripmaster официальный, tripmaster 24, tripmaster ton, tripmaster biz проверка заказа, tripmaster24, tripmaster24 biz, mastertrip24 biz, tripmaster24 diz
[b]Зеркало:[/b] [url=https://tripmaster.info]tripmaster.live[/url]
[b]6. Syndi24[/b] ★★★★★
Стабильный магазин — синдикат официальный сайт. Рабочий вход.
Проверенный магазин — syndi24, syndi24 biz, syndi24 bz, синдикат 24, синдикат бот, синдикат шоп, синдикат сайт, синдикат официальный сайт, syndicate 24 biz, syndicate biz, syndicate one, syndicate 24 4 biz зеркала
[b]Зеркало:[/b] [url=https://syndi24.shop]syndi24.sale[/url]
[b]7. Narco24[/b] ★★★★★
Работает без перебоев — narcolog24 biz. Широкая география.
Надёжная площадка — narkolog, narkolog ru, narkolog biz, narkolog 24 biz, narkolog me, narco24, narco24 biz, narco24 biz официальный, narco24 официальный сайт, narcolog24, narcolog24 biz, narco 24, narco 24 biz
[b]Зеркало:[/b] [url=https://narcolog1.click]narcolog.rip[/url]
[b]8. Tot[/b] ★★★★★
Проверенна&#
Leave a Comment