
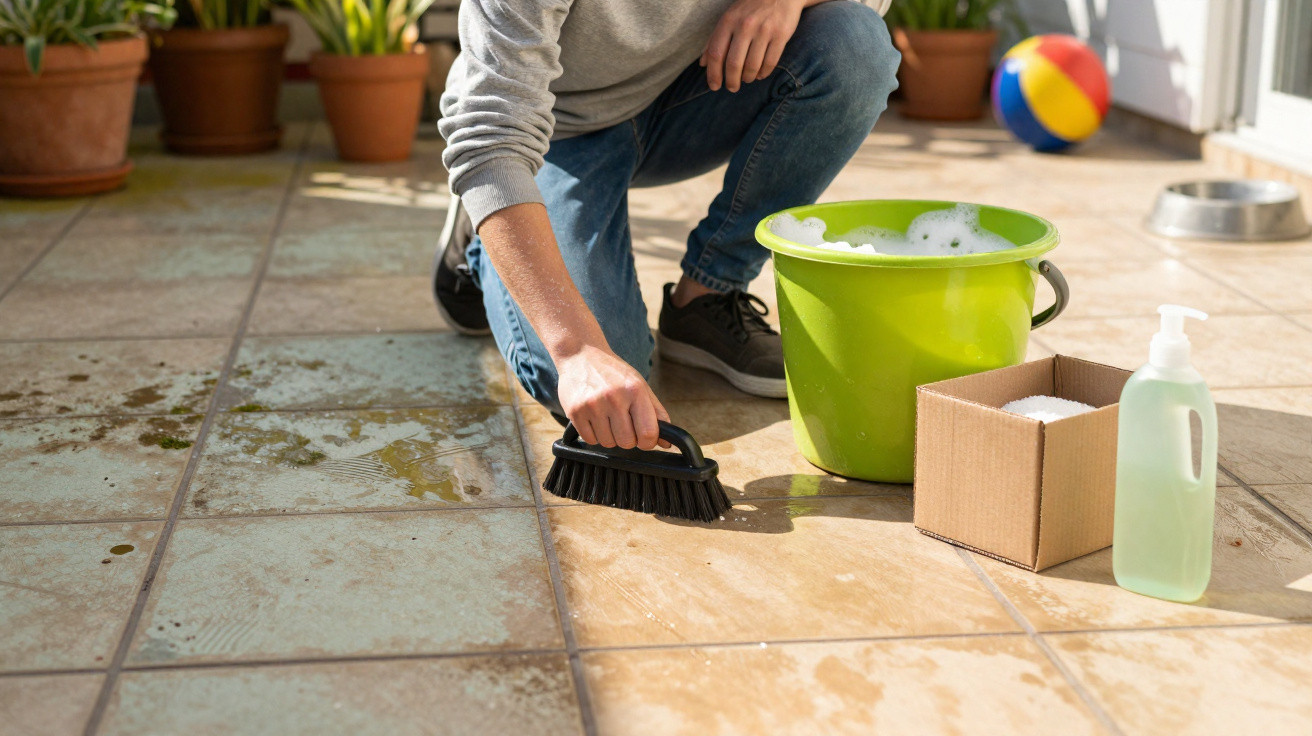
Many people instinctively reach for a pressure washer, chlorine or vinegar, then later wonder why the joints have broken away, the paving has gone dull and the flowerbeds are suffering. A straightforward combination of two everyday products delivers the same result – without white vinegar, professional equipment and with far less impact on the garden and pets.
Why the patio looks so grimy after winter
After months of rain, frost and limited sunshine, algae, lichens and layers of dirt settle on paving slabs. Rust rings or brown stains from metal and wood can also develop where tables, chairs or barbecues have been standing.
Because this change happens gradually, it is barely noticeable during winter. Then, the first time you sit outside in spring, the whole area can suddenly look grey, dull and neglected. Many people feel almost compelled to “use a sledgehammer to crack a nut” and bring out the pressure washer or harsh chemicals.
Why vinegar and pressure washers are not a lasting answer
A pressure washer removes dirt efficiently, but its powerful jet also brings drawbacks:
- Jointing material is washed out, allowing weeds to return more quickly.
- It roughens the surface of the slabs, so dirt will cling more readily in future.
- On older patios, entire slabs can loosen or edges may chip away.
Many amateur gardeners switch to supposedly “natural” options and pour vinegar water across the patio. That may sound gentle, but it is not: vinegar is an acid. It can etch certain natural stones, leave pale marks and damage their structure. If the mixture runs into the soil, it may harm microorganisms and nearby plants.
“Anyone who uses vinegar, chlorine or a pressure washer every year risks ruining their patio in the long run – even though they are actually trying to save it.”
The two simple products that get patio slabs clean again
The method described here uses a blend of soda crystals and ordinary washing-up liquid. Nothing else is required.
What soda crystals can do
Soda crystals, also known as washing soda, were originally used for laundry care. They break down greasy dirt, soften organic deposits and help lift stubborn films from hard surfaces.
- They dissolve grease and barbecue residue.
- They loosen green deposits and general outdoor dirt.
- They can be rinsed away completely with water.
Important: washing soda is not the same as caustic soda. The latter is much more aggressive and has no place in patio joints. In shops, washing soda is usually found in the laundry or cleaning aisle.
Why washing-up liquid is the unsung hero
Washing-up liquid has two key advantages: it cuts through grease and spreads effectively across wet surfaces. On patios where barbecuing is common, or where soot and fine dust settle from nearby roads, a light greasy film can form on the slabs. This makes dirt and green growth more persistent.
A basic, clear washing-up liquid without added bleach is entirely sufficient. Those wishing to treat plants as gently as possible can choose an environmentally labelled version.
How the 2-product patio cleaning trick works, step by step
The clever part is that it requires no specialist equipment and creates no noise. A broom, stiff brush, bucket and garden hose are enough.
- Clear the joints: First, remove weeds with a joint scraper or an old knife blade. The cleaner the joints are, the more evenly the solution will spread.
- Sweep away loose dirt: Thoroughly brush the whole area with a stiff broom.
- Wet the slabs: Use a garden hose to dampen the patio evenly until the surface is properly wet.
- Scatter the soda crystals: Sprinkle them thinly and evenly over the damp patio. Do not make piles; a light covering is enough.
- Add the washing-up liquid: Squeeze a few lines or dots over the area from the bottle, without using too much.
- Scrub: Work the mixture into the surface, slab by slab, with a scrubbing brush or a stiff yard brush.
- Leave it to work: Then leave the area alone. Up to two days is ideal, and rain during this time is not a problem.
- Rinse thoroughly: Once the waiting time has passed, rinse everything well with the hose until no foam remains visible.
“The combination of soda crystals and washing-up liquid releases the dirt, the broom provides the mechanical action, and time does the rest.”
Safety points and common patio cleaning mistakes
Although soda crystals are considerably milder than strong drain cleaners or acids, they are alkaline. A few basic precautions make their use safer:
- Wear gloves while scattering and scrubbing.
- Keep children and animals away while the surface is wet.
- Cover open drains if they contain sensitive materials.
Anyone using the mixture for the first time, or dealing with delicate natural stone, should test it in an inconspicuous corner. This makes it easier to see how the stone responds and how firmly it can be scrubbed later.
What can undo the result
After a successful cleaning session, many people habitually reach for bleach or vinegar again at the next small discolouration. That is precisely what weakens the joints and can stain the surface. Wire brushes and very coarse abrasive pads also create microscopic grooves in the stone – ideal places for the next layer of green growth to take hold.
Sweeping too often and too forcefully with metal-edged tools can also cause long-term damage. Brushes with firm but non-metal bristles are a better choice.
How to keep the patio cleaner for longer afterwards
Once the winter grime has been removed, maintaining the result takes very little effort. A simple care routine is enough:
- sweep briefly every two to three weeks;
- deal with spilled drinks or barbecue grease immediately using warm washing-up water;
- remove fallen leaves promptly in autumn so they do not leave dark stains;
- repeat the 2-product method in a lighter form once a year – in spring or autumn.
Placing garden furniture and the barbecue on small rubber feet or protective pads also helps prevent rust and tannin marks on the slabs.
Different surfaces, small adjustments
The method can be adapted slightly according to the material:
- Concrete and exposed-aggregate slabs: Usually unproblematic; these surfaces can generally cope with more vigorous scrubbing.
- Ceramic and porcelain patios: These are usually very smooth, so use less soda and a softer brush, otherwise the surface may become slippery while you work.
- Light-coloured natural stone: Test a small area first, use less product and rinse thoroughly.
For newly laid patios, it is worth checking the documentation from the manufacturer or building contractor. Some surfaces are factory-coated and require particular care.
What is really behind green patio deposits
The green film that appears on patios after winter is usually made up of algae and fine lichens. They thrive in damp, shaded conditions. Wherever water remains for longer or air circulation is limited, fresh layers can quickly form – even after a thorough clean.
Where possible, take preventative measures in the layout as well: create a slight fall so rainwater can drain away, and avoid pressing heavy plant pots directly against house walls or garden walls. Even a gap of a few centimetres improves airflow and slows the return of deposits.
Practical considerations for homes with pets and families
Choosing a cleaning method matters especially in households with children or pets. Residues from strong cleaners can otherwise end up on paws, bare feet or in flowerbeds.
The mixture described here is a good option because, after thorough rinsing, it leaves no aggressive chemicals behind. Anyone wanting extra reassurance should wait until the area is completely dry before using it again and, if in doubt, rinse once more with clean water.
Pet owners will know the issue of food and water bowls on the patio: rings and dark patches can soon develop beneath them. One useful tip is to place plastic or rubber mats underneath and clean these separately – helping the surrounding surface remain presentable for much longer.
Comments
No comments yet. Be the first to comment!
Leave a Comment