
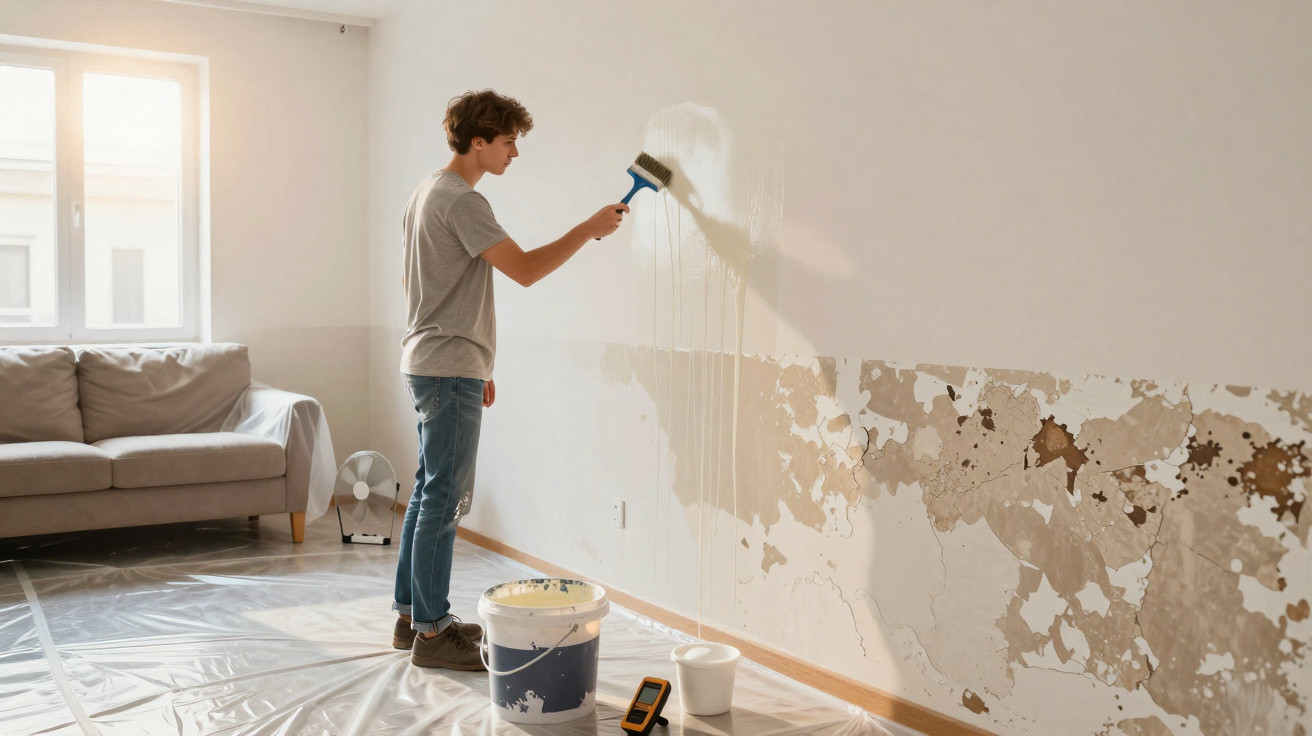
Wall water ingress is a frequent issue in houses and flats, particularly in areas with heavy rainfall or in older buildings. Where damp is mild, a DIY solution can often help manage it, establish a temporary protective barrier and buy time until a more substantial repair becomes possible. First, however, it is important to establish where the water is coming from and what type of water ingress is involved.
How can you tell whether wall water ingress is mild or more serious?
Begin by distinguishing a surface-level issue from a structural one. Check the size of the marks, how regularly they return and whether there is widespread damage to the plaster. Mild water ingress usually causes small damp patches, blistering and localised flaking paint, often following rain or during colder periods.
More severe cases generally affect larger sections of the wall, with loose plaster, a persistent strong musty smell and, on occasion, running water. Damp that appears at the bottom of a wall and rises from the ground may indicate rising damp. This is more common in older ground-floor homes that lack suitable foundation waterproofing.
How should you select and prepare the right DIY solution for mild water ingress?
For superficial water ingress, many people use diluted acrylic sealer or water-based resin, sometimes alongside concentrated liquid waterproofing products. The aim is to create a film that limits water absorption by the plaster, acting as a temporary “shield” against damp.
These products are available from builders’ merchants and can be applied at home in a straightforward way, provided that the manufacturer’s instructions are followed. Usually, the mixture contains a primary sealing component, clean water to alter the viscosity and a moisture-resistant additive. Together, these form a base that improves paint adhesion and reduces water penetration.
How do you prepare the wall and apply the waterproofing mixture?
Careful preparation greatly improves how long the treatment lasts, as the wall must be sound and clean in order to take up the solution properly. Before applying anything, scrape away loose paint, remove mould with diluted bleach and fill minor cracks with a suitable filler. Allow the area to dry as thoroughly as possible.
Once the surface is prepared, the product is generally applied in simple stages using a brush or short-pile roller. Successive coats soak into the plaster and build the protective barrier. In summary, the process normally involves:
- Applying a more diluted first coat as a primer, allowing it to penetrate deeply.
- Leaving it to dry for 2 to 4 hours, or for the time specified by the manufacturer.
- Applying a second and, where needed, a third less-diluted coat to create a thicker layer.
- Monitoring absorption: if the product will not adhere or the wall remains saturated, there may be a more serious internal leak.
How can you protect the wall after DIY waterproofing?
After it has dried, finish the surface with acrylic paint intended for damp spaces or exterior walls, as it is more resistant to temperature changes and water vapour. Keep the room well ventilated, position furniture away from affected walls and regularly inspect the outside of the property. Check gutters, window sealant and any locations where water may enter.
This type of solution generally works well as a temporary measure for mild water ingress, reducing stains, mould and peeling paint for a period. Nevertheless, tracking how the problem develops is essential when deciding whether more extensive work will eventually be required to the structure, foundations or pipework, ensuring lasting safety and comfort in the property.


Comments
No comments yet. Be the first to comment!
Leave a Comment