
It is not happening at random.
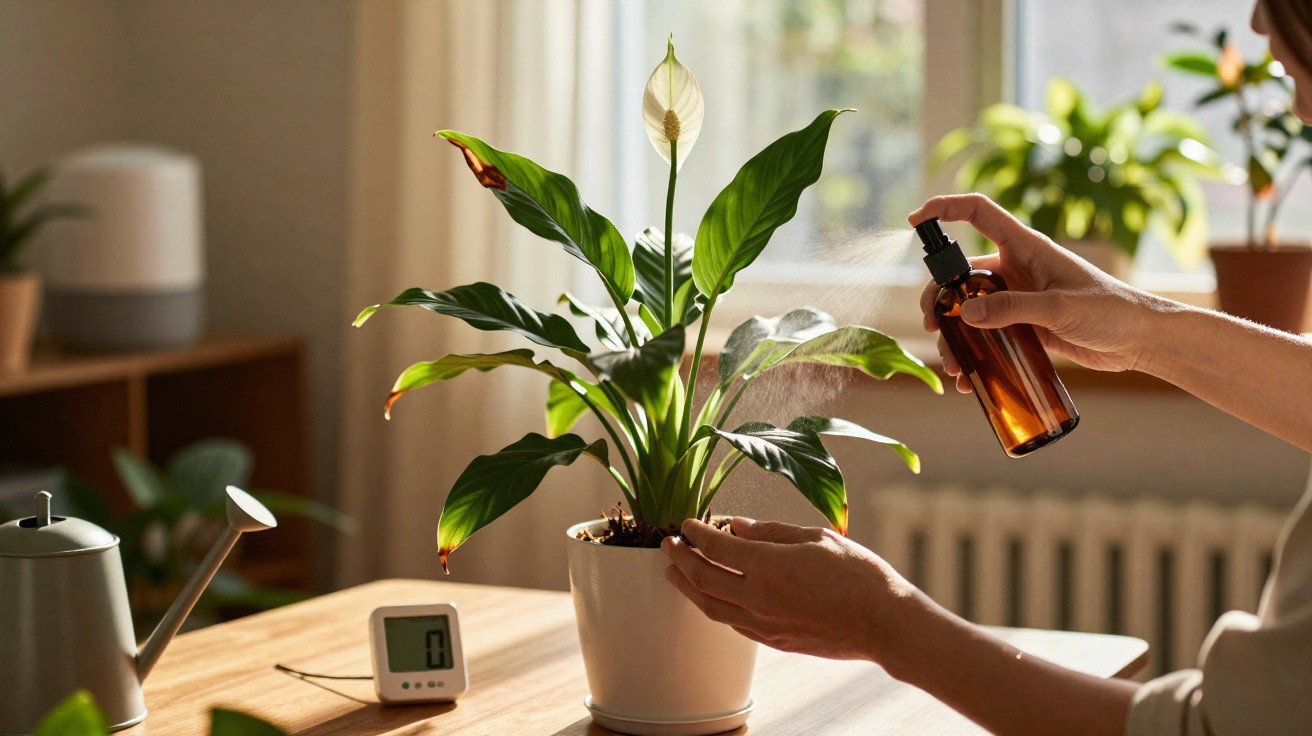
Although Spathiphyllum, or the peace lily, is relatively forgiving, it shows signs of stress quickly. Brown patches and crisp leaf tips are the plant’s way of flagging a problem with air, watering or light. Specialists use these clues to identify the cause, and a few small changes can restore rich green foliage.
What brown tips on a peace lily can mean
Brown areas on a peace lily usually point to unsuitable care rather than a fatal disease. Dry air, inconsistent watering, hard tap water and intense sunlight can all trigger this response. As each issue leaves a slightly different pattern on the foliage, the markings can guide you towards the right solution.
Most peace lilies want consistently moist soil, bright but indirect light, soft water, and humid air. Miss one, and the leaf edges speak up.
The five most common causes
Low humidity
Dry household air draws moisture out of a peace lily’s delicate leaves. The margins usually turn tan before larger parts of the leaf become brown. This is particularly common near radiators, heating vents and areas exposed to continual air movement.
- Keep relative humidity around the plant at 45–60%; many homes drop to about 30% during winter.
- Use a small humidifier nearby throughout the heating season, ideally with a timer to maintain stable levels.
- Position plants together to form a shared microclimate, or stand the pot on a pebble tray filled with water below the base of the pot.
- Misting provides only brief relief and may leave marks on foliage where the water is hard.
Underwatering
If the root ball is allowed to dry, the foliage wilts dramatically before the tips become crisp. Watering will revive the plant, but the brown areas will not return to green.
- Test the compost twice a week and water once the top 2.5 cm feels slightly dry rather than dusty and powdery.
- Water generously until surplus water runs out, then empty the saucer. Small amounts of water can leave the centre of the root ball dry.
- When compost has shrunk away from the sides of the pot, immerse the pot up to its rim for 10–15 minutes to rehydrate it.
Overwatering
Soil that stays wet continually deprives roots of oxygen, causing stress and encouraging rot. Leaves tend to yellow from the base before brown patches appear. Growth also slows, while the pot remains heavy for several days.
- Select a pot with a drainage hole, and avoid decorative outer pots unless they contain a removable nursery pot.
- In lower-light months, allow the top 2.5 cm of compost to dry before watering again.
- If the roots are soft or smell sour, repot the peace lily in fresh, free-draining compost after cutting away damaged roots.
Chemicals in tap water
Municipal tap water containing fluoride or high levels of dissolved minerals can affect peace lilies. The tips may brown with a narrow pale border, and a white deposit can develop on the compost surface or around the pot rim.
- Change to rainwater, distilled water or filtered water. Leaving tap water overnight allows chlorine to dissipate, but it will not remove fluoride.
- Every two to three months, flush the pot with clean water to remove accumulated salts.
Excessive sun
Direct sunshine can scorch these thin leaves. Look for bleached, brittle patches on the side of the plant facing a window or grow light.
- Keep the plant a short distance back from a bright window, or filter the light with a sheer curtain.
- Provide bright, indirect light: north- or east-facing aspects often suit it, as does a mid-room position near a south-facing window.
Quick peace lily diagnostic guide
| Symptom | What to check | Likely cause | First fix |
|---|---|---|---|
| Crisp brown tips, with an otherwise green plant | Room humidity and nearby heating | Low humidity | Add a humidifier and move it away from the heat source |
| Rapid drooping, followed by brown tips after recovery | Compost is completely dry and pot is light | Underwatering | Soak deeply, then follow a regular routine |
| Yellow leaves accompanied by brown patches | Compost remains wet for days and pot feels heavy | Overwatering | Increase watering intervals and improve drainage |
| Brown edges with a pale halo and crust on compost | Signs of hard tap water | Fluoride/salt sensitivity | Use rainwater or filtered water; flush the compost |
| Bleached, crisp marks facing the window | The room’s light pattern | Sun scorch | Move to bright, indirect light |
Should brown leaves be removed?
Yes. Use clean shears to cut fully brown leaves off at the base. Where only the tips are brown, trim away the damaged section while following the leaf’s natural outline for a neater finish. Clearing damaged material lets the plant direct energy into healthy growth and stops dead tissue from harbouring fungal spores.
Keep the soil evenly moist, never soggy. When in doubt, check with your finger before you water, not after.
A reliable watering, light and potting routine
- Water: Soak the compost thoroughly, then wait until the top 2.5 cm is just dry. The plant will use water more slowly in winter.
- Water quality: Rainwater, distilled water or filtered water helps prevent fluoride stress. Flushing monthly limits salt accumulation.
- Light: Bright, indirect light is best. Turn the pot each week to promote balanced growth.
- Humidity: Keep it at 45–60%. Pebble trays and small humidifiers are simple, low-maintenance choices.
- Soil: A peat-free houseplant compost amended with perlite or bark gives roots better airflow.
- Fertiliser: Apply a diluted balanced feed sparingly in spring and summer. Do not feed during winter.
- Pot: Use a container with drainage, increasing pot size only once roots are circling inside the existing pot.
Other pitfalls to avoid
Cold draughts can create brown leaf spots overnight. During winter, keep the plant clear of external doors, and in summer keep it out of air-conditioning currents. Leaf-shine products can block leaf pores and make browning worse, so use a damp cloth to remove dust instead.
Pests are seldom responsible for brown tips, although spider mites flourish in dry conditions and can leave fine stippling on leaves. If webbing is visible, rinse the foliage in the shower and raise humidity. For mites that persist, apply a mild plant-safe soap solution to both sides of each leaf.
How to reset a struggling peace lily
If several leaves are brown and the compost has a sour smell, remove the plant from its pot. With sterile scissors, cut off any mushy roots. Repot it in fresh, airy compost, water with filtered water and place it in bright, indirect light. Avoid feeding for four weeks while the roots settle in again.
A practical weekly routine
Choose one day for plant care. Check the compost with your finger rather than relying on the calendar. Turn the pot by a quarter rotation, refill the humidifier, top up the pebble tray and wipe one or two leaves. This five-minute habit prevents most browning problems before they develop.
Useful details for lasting success
Peace lilies favour pots that are slightly snug; too much unused compost remains wet and increases the risk of rot. Use room-temperature water so roots are not shocked. Where tap water is especially hard, a small countertop filter may prove worthwhile through healthier foliage.
For blooms, bear in mind that strong indirect light supports flowering more effectively than heavy feeding. Mature flower stems naturally brown as blooms fade; cut them at the base to keep the plant tidy and encourage new growth.




Comments
No comments yet. Be the first to comment!
Leave a Comment