
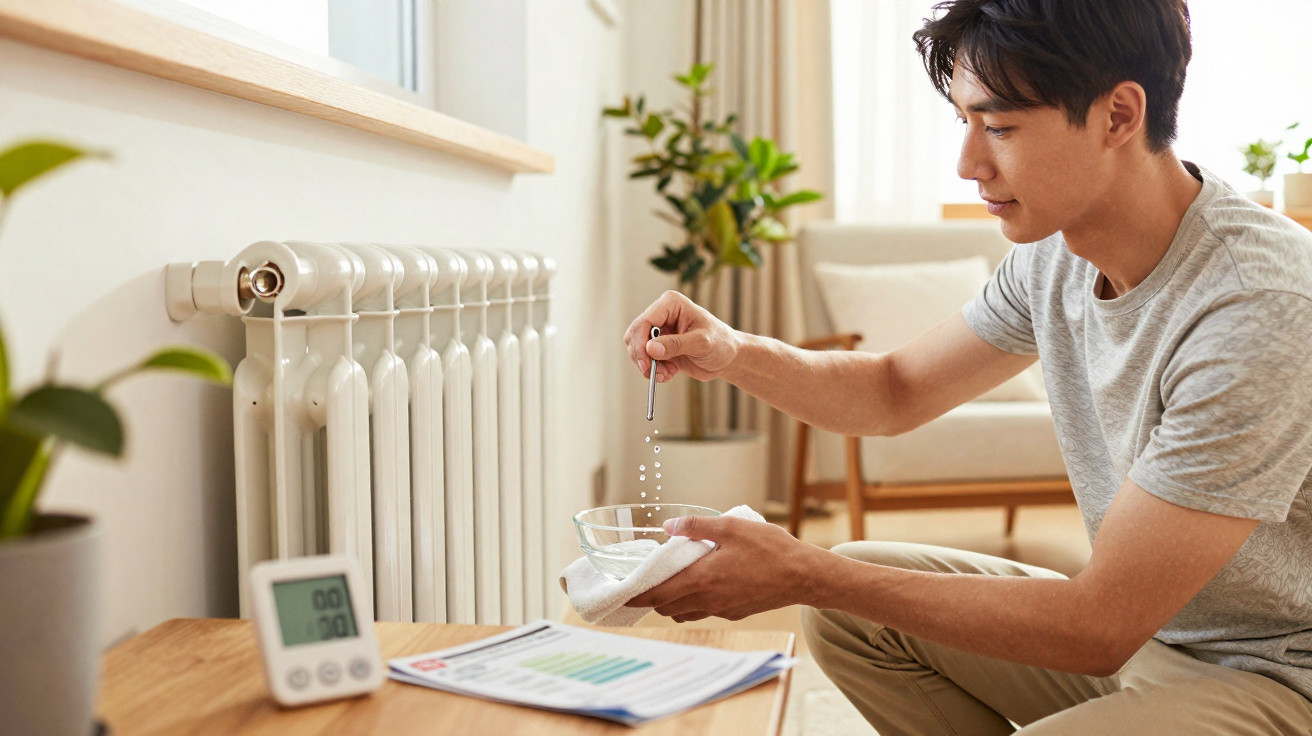
Winter creeps indoors and, all of a sudden, the radiator starts sounding like an aquarium. Cold at the top, scorching at the bottom-and your hands are still freezing. Air trapped in the heating system steals heat and, with it, money. A seasoned heating engineer shows how to bleed a radiator in minutes, steer warmth around the house more effectively and cut energy use straight away. No toolbox, no drama-just a small key and the nerve to give the valve a brief twist.
He puts his hand on the hallway radiator, nods, and taps the metal once, as if he were checking a watermelon. “Can you hear that?” he asks as the faint gurgling starts. Then he fishes a small square radiator key out of his jacket pocket, holds a bowl underneath, and the room fills with an almost gentle hiss. A puff of damp air. A small puddle. And suddenly the whole panel heats evenly. He smiles like he’s just found a hidden compartment-and leaves the door slightly ajar.
How to tell your heating has air in it - and what it costs
The giveaway is familiar: the top of the radiator stays cool while the lower section is hot. You turn the thermostat up, get impatient, then turn it up again. Instead of heating rooms, the system is battling air pockets. Air in a radiator is wasted energy. It slows the flow of hot water, keeps the pump working longer and makes the boiler cycle on and off more often. It feels as if the heating has “lost its power”-in reality, it’s simply full of air.
A real example from an older home with high ceilings: the R. family had three radiators that were only “half working” and gurgled in the evenings. After bleeding them, the surface temperature on the bathroom radiator rose by 8°C, measured with a basic infrared thermometer. That evening, the gas boiler ran for 45 minutes less. Spread across the heating season, that can quickly add up to 5 to 10 percent savings-no new kit, just letting air out. It’s the sort of difference you notice on the annual energy bill.
So where does the air come from? From topping up with fresh water, from tiny leaks, and from pressure changes as the system heats up and cools down. Microbubbles tend to collect at the “top” of the system-upper floors and tall radiators. When the flow rate weakens there, air pockets effectively block the channels. The circuit becomes unsettled: some rooms overheat while others are under-supplied. Bleeding smooths the circulation again-and that’s exactly when heat starts spreading more efficiently.
Bleeding radiators like a pro: it’s easier than you think
Do it in this order: switch the heating off, pause the circulating pump, then wait 20 to 30 minutes. You only need a small container, a cloth and a radiator bleed key. Start upstairs at the highest and most distant point, then work room by room. Open the valve a quarter turn, hold the container close, wait for the hissing, let a little water run, then close it again. That hiss-like opening a fizzy drink-is what you want to hear.
Afterwards, check the boiler pressure gauge: 1.2 to 1.8 bar on a cold system is typical. If the pressure is low, top up via the filling loop-slowly and without rushing.
Everyone knows the moment you tell yourself, “That little gurgle will disappear.” It rarely does. Common mistakes? Bleeding with the pump running, which can keep pulling new air in and makes you chase your tail. Or opening the valve too far so water jets out, you jump, and you slam it shut. Not the end of the world-just wet. Better: bleed when the radiator is warm to the touch rather than piping hot, keep a cloth within reach, and make small, controlled turns. Let’s be honest: nobody does this daily. For most homes, once in autumn and once mid-winter is enough.
The expert raises a finger, as if adding a footnote. Two minutes with a bleed key beats an hour of turning the thermostat up. If you still have cold patches afterwards, check whether the lockshield valve (return valve) is throttled too far, or set the pump to a lower, steady setting.
“Bleeding is the smallest bit of maintenance in the world-and the one with the biggest immediate impact. First get the air out, then fine-tune with the thermostats. Not the other way round.”
- Order: start upstairs, furthest from the heat source, then work down.
- Tools: radiator key, cloth, small bowl, torch.
- Pressure: check after bleeding and top up gently if needed.
- Check: feel again 20 minutes later-the radiator should be evenly warm.
Directing heat around the house: small actions, big results
Distributing warmth is like managing traffic: clear routes keep things moving. Furniture pushed up against radiators creates a bottleneck; long curtains act like barriers. Remove covers, dust the fins, and don’t hide thermostats behind sofas. Doors act as the conductor: leave them open if you want warm air to drift into the hallway, close them if you need heat to stay in one room. Reflector foil on outside walls helps push radiant heat back into the room instead of into the brickwork. After bleeding, check the system pressure-otherwise the house can cool down even though the pipes feel hot.
Thermostats behave more sensibly at moderate settings. Level 3 is roughly 20°C; level 5 rarely brings comfort, just higher losses. If you hold 19°C during the day and prefer 20 to 21°C in the evening, you keep the pump steadier and avoid constant boiler cycling. Fine balance comes from the lockshield valves: open them more on distant radiators, and throttle slightly closer to the boiler. This kind of “hydraulic feel” helps all radiators warm up together instead of one racing ahead.
Small routines matter too. Once a month, “scan” your radiators by hand and check whether heat arrives evenly. If one is lagging, don’t stew over it-grab the key, release the air, job done. Saving energy shouldn’t feel like punishment. If you ventilate in the evening, do it briefly with a proper through-draught rather than leaving a window on the latch for hours. That way the remaining warmth stays in the walls and the boiler has less to do. And yes, a smart thermostat app is nice-but your hand on the metal doesn’t lie.
What sticks: think about heat instead of just turning it up
You notice immediately when a radiator can “breathe” again after bleeding. The quiet. The evenly warm surface. That isn’t wellbeing-it’s physics, and a small win against running costs. Removing air gives the pump a clear run and lets water move freely. After that, it’s habits: clear the airflow, choose thermostat settings wisely, and use doors deliberately. Some of these points sound obvious, but together they work like an upgrade for the whole house. The appeal may be exactly that: turning gurgling into warmth in five minutes, without spending a penny-and then lending the key to next door tomorrow.
| Key point | Detail | Why it matters to you |
|---|---|---|
| Bleed in the right order | Start upstairs, begin with the radiator furthest away, then work down | Faster results, less rework |
| Keep an eye on pressure | After bleeding, aim for 1.2–1.8 bar on a cold system | Stable warmth, no cooling off despite hot pipes |
| Clear the heat pathways | Move furniture, shorten curtains, remove dust, use reflector foil | More heat in the room, lower consumption |
FAQ
- How often should I bleed radiators? Once or twice per heating season is enough in most homes. After work on the system, or if there’s loud gurgling, do it again.
- Where do I start-upstairs or downstairs? Upstairs. Air collects at the highest points. Begin with the furthest radiator on the top floor and work your way down.
- How do I know I’m finished? The hissing stops, a steady stream of water appears, and the radiator warms more evenly. Check again after 20 minutes.
- What if the pressure is too low after bleeding? Top up slowly via the filling loop until the needle sits in the green zone. Take it step by step-no rushing.
- Can I damage anything? As long as you open the valve slightly and don’t force it, practically not. A few drips are normal-keep a cloth handy.
Comments
Создание мебели из массива дерева предполагает четкое соблюдение технологического процесса сушки и первичной обработки древесины https://mebel-er.ru/portfolios/mebel-dlya-spalni
Опытные профессионалы используют оптимальные защитные составы, не вредящие природному цвету и фактуре дерева https://mebel-er.ru/photogallery
Даже недорогая древесина смотрится презентабельно и статусно, если правильно ее обработать https://mebel-er.ru/privacy-policy
Эксклюзивная детская мебель на заказ
Эксклюзивная мебель нестандартных размеров и эксклюзивного дизайна, изготовленная из редких материалов делается на заказ https://mebel-er.ru/partners
В таком случае мебель будет более технологичной, с использованием только качественных материалов https://mebel-er.ru/partners
Leave a Comment