
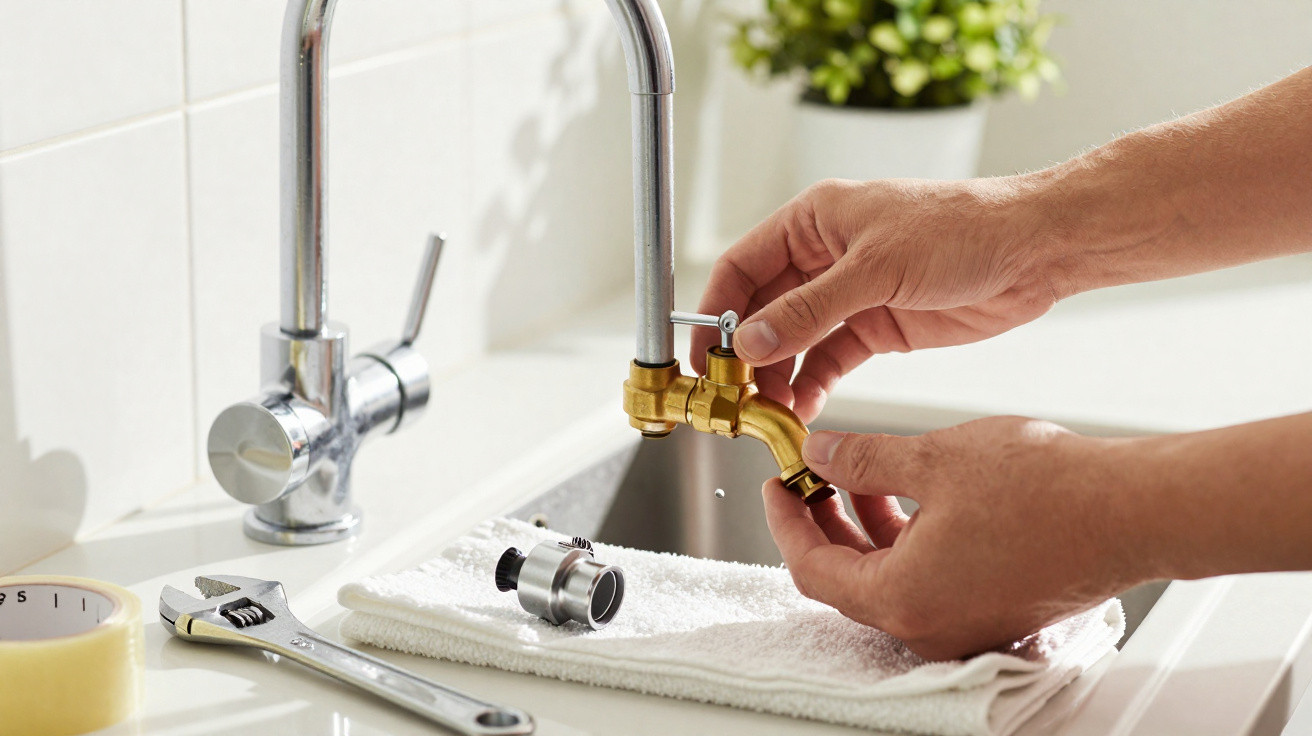
The kitchen tap drips at 23:40: loudly enough to break the silence, yet slowly enough for you to put the issue off until tomorrow. Then the drips turn into a trickle, the handle starts to resist, and the thought of calling a plumber is enough to make you wince before you have even asked for a price. We have all faced that moment when a minor household fault suddenly feels far too daunting. Yet, in most leaking mixer taps, the culprit is an inconspicuous and often accessible component that costs far less than an emergency call-out. All it takes is a calm approach, a few tools and 15 minutes. There is no need to redo the plumbing: you simply need to understand what sits beneath the handle.
When the drip really comes from the cartridge
A mixer tap does not always leak in the same way, and how it leaks already provides useful clues. When water continues to fall from the spout despite the handle being fully closed, the ceramic cartridge is usually the first thing to suspect. This small part controls both water flow and the hot-and-cold mix; limescale, wear or even a grain of sand can eventually prevent it from sealing properly. A steady dripping sound may initially seem harmless, but it can soon become maddening. It can also increase your water bill without you properly noticing.
In an older flat, Léa eventually started leaving a bowl beneath her bathroom tap overnight. She assumed the entire mixer tap needed replacing, until a neighbour showed her a new cartridge bought for £18 from a DIY shop. The plumber she had contacted, meanwhile, quoted a call-out and labour charge close to £150, excluding the part depending on the model. Fifteen minutes later, the trickle had gone. Fitting the replacement had not taken longest: finding the screw concealed beneath the handle’s small coloured cap had.
Leaks can also emerge around the bottom of the handle, from the tap body or beneath the sink. In these situations, the cartridge is not necessarily to blame: an O-ring, flexible hose or loose nut may be responsible. Watch carefully before taking anything apart, rather than rushing in because the video on your phone made it look easy. Let us be honest: nobody does this every day. Taking a photograph before each stage prevents uncertainty during reassembly, especially once the small components start collecting on a towel.
Replacing a mixer tap cartridge without turning the kitchen into a building site
First, shut off both isolation valves beneath the sink, then open the mixer tap to release any remaining pressure. If there are no isolation valves, turn off the property’s main water supply after warning any other occupants where necessary. Next, cover the plughole with a cloth or plug: dropping a tiny screw into the waste can turn a quick repair into a genuinely bad memory. Lift off the handle cap using a fingernail or small flat-head screwdriver, loosen the Allen screw and remove the handle. You will then see the decorative cover and retaining nut.
After removing the nut, ease out the cartridge by pulling gently, sometimes with a slight twisting motion. Do not use pliers to force the chrome tap body: scratches remain visible, while excessive force can damage the thread. Place the old part beside the replacement and check every detail: diameter, locating lugs, height, spline count and seal positions. The right cartridge is the one that matches the model exactly, not one that merely looks nearly the same. Keeping the old component in a small bag to take to the shop is often the safest approach.
Before inserting the new part, wipe the housing with a clean cloth and remove visible limescale deposits, without scraping at it as though you were scouring a saucepan. Fit the cartridge in the correct orientation, tighten the nut without overdoing it, refit the handle, then restore the water supply very gradually.
“If the handle jams during reassembly, do not take that as a sign to force it: the cartridge lug is often not lined up with its slot.”
Keep these items close by:
- an appropriately sized Allen key, usually between 2.5 and 4 mm;
- a slim flat-head screwdriver for the handle cap;
- a cloth, a small brush and white vinegar;
- your phone torch, which is particularly useful beneath a dark sink;
- the mixer tap reference or the old cartridge.
Mistakes that cost more than a new mixer tap cartridge
The most common trap is buying a universal cartridge without checking the tap’s brand. Some references look almost identical, but their locating lugs sit in different places, meaning the handle never achieves a clean shut-off. Brands such as Grohe, Hansgrohe, Jacob Delafon and Ideal Standard often use cartridge formats specific to their ranges, with variations according to the manufacturing year. A compatible cartridge can work, provided its measurements are genuinely identical. An old receipt, instruction booklet or photo of the mixer tap can save valuable time at the counter.
Another regular mistake is tightening the retaining nut as though it alone must prevent a flood. The cartridge needs to be held securely, nothing more. Overtightening can compress the seals, make the handle stiff or weaken a plastic component. Once reassembled, run the water for one minute, alternating between hot and cold, then inspect beneath the sink and around the tap base. If the water remains cloudy for a few seconds, it is often simply limescale disturbed during the repair. A calm check is better than hurriedly dismantling everything again.
DIY replacement has its limits, and recognising them can stop an already frustrating issue from becoming worse. If the mixer tap body is cracked, water is rising beneath the worktop, the isolation valves have seized, or the flexible hoses show signs of rust, it is better to seek professional advice. A concealed slow leak can swell timber, damage a cabinet and reach the flat below. Sensible DIY is not a competition. It also means knowing when to stop, before the dreaded £150 turns into a much larger bill.
| Key point | Detail | Benefit for the reader |
|---|---|---|
| Identify the leak | A leak from the spout while the handle is closed often points to the cartridge. | Avoids replacing the entire mixer tap unnecessarily. |
| Prepare for dismantling | Turn off the water, protect the plughole and photograph each stage. | Reduces oversights, lost parts and stress. |
| Select the correct part | Compare the diameter, locating lugs, height and brand reference. | Improves the chances of completing the repair successfully first time. |
Repairing a leaking mixer tap is not some great feat reserved for people who are used to handling tools. More than anything, it is the satisfying shift from irritation at a repetitive drip and an intimidating quote to a practical solution found at home. A new cartridge will often cost between £15 and £50, depending on the model, and the time saved matters almost as much as the money. Perhaps the best part is the quiet restored to the kitchen or bathroom. This repair may also encourage you to view everyday faults differently: a worn seal, a temperamental toilet flush or a sticking handle. And in your home, which appliance might deserve 15 minutes of attention before an expensive call-out?



Comments
No comments yet. Be the first to comment!
Leave a Comment