
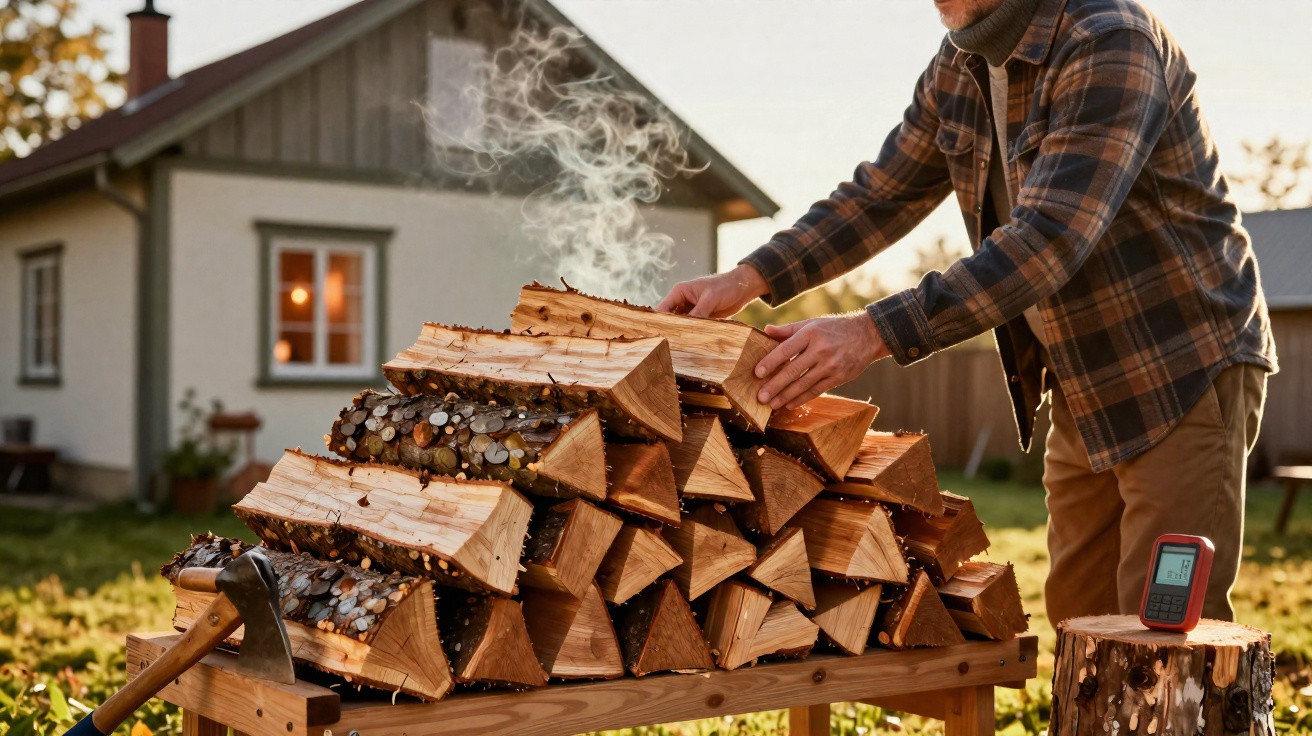
Across France and large parts of Europe, homeowners are discussing a straightforward method which they say can nearly double the warmth produced by every log. It does not require an expensive replacement stove; instead, it comes down to how the wood is split, dried and stored.
Why wet logs can ruin your heating plans
Most buyers assess firewood by its cost and volume. Yet moisture content is the factor that makes the greatest difference. Newly felled timber may hold 50% water or even more. If it is burned before it has dried, much of its energy is spent evaporating water rather than heating your living room.
Dry logs with less than 20% moisture can deliver up to twice as much usable heat as freshly cut wood of the same volume.
Damp logs burn inefficiently, linger in the stove and release large amounts of smoke. As this smoke cools in the flue, it condenses into creosote, a tar-like substance that may ignite within the chimney. Fire brigades throughout Europe regularly caution that inadequately seasoned firewood is a major cause of chimney fires each winter.
Moist wood also darkens stove glass, blocks air inlets with soot and means you must use more logs to achieve the same level of comfort. The online “trick” people praise is therefore not really a gadget, but a process: dry the wood properly so that the stove can perform as intended.
How to tell whether your logs are genuinely ready to burn
Many householders assume that wood which has “sat outside for a while” is ready for the fire. In most cases, that assumption is unreliable. Firewood suppliers may describe their stock as “seasoned” without stating a specific moisture percentage.
- Appearance: Properly dry wood is generally greyer than freshly cut yellowish or reddish timber. Small splits often appear on the ends.
- Weight: Two similarly sized logs can feel markedly different in the hand. The lighter log is usually drier and easier to carry.
- Sound: Strike two logs together. Dry wood produces a sharp, almost ringing note, while wet wood makes a dull thud.
- Smell: Freshly cut timber has a pronounced sap or resin scent. Well-dried wood smells faintly, if at all.
A moisture meter is still the most dependable way to check. Push the probes into a freshly split surface of the log. For modern stoves, readings below roughly 20% are usually regarded as appropriate.
A £15 moisture meter can save you hundreds in wasted wood and poor performance over a single heating season.
The drying “hack” users say transformed their winter
The widely shared advice behind comments such as “I’ve seen a real difference since this week” is remarkably simple: split wood sooner, stack it more effectively, and allow sunlight and airflow to do most of the drying. Applied correctly, this approach can nearly cut drying time in half while significantly increasing heat output.
Split wood early and into smaller pieces than expected
Professionals emphasise one essential rule: do not leave large rounds sitting unsplit. Divide them as soon as you can after felling. Every split increases the exposed surface area and allows moisture to evaporate more quickly.
Size is the other element of the method. Rather than using thick, heavy pieces, many users find that smaller logs give cleaner fires and better heat - approximately 30 to 50 cm long and not excessively wide in diameter.
- Smaller pieces dry more quickly.
- They ignite with less effort.
- They make it easier to regulate the burn rate and temperature.
Although this requires additional work at the outset with an axe or log splitter, the reward is a stove that produces noticeably more warmth from the same stack of wood.
Ensure air can move around every log
The way logs are stacked is the second key factor. A tightly packed, dense pile retains moisture. Instead, elevate the wood on pallets or a basic timber frame. The space below enables passing air to remove moisture.
Keep narrow gaps between rows and do not compress the logs too closely. Many professionals advise alternating the direction of each layer, creating natural channels for airflow. The stack may appear less compact, but this open arrangement is precisely what helps dry the centre of every log.
Rely on sunshine and wind rather than plastic
Where the stack is placed matters just as much as how it is arranged. A sunny, breezy location - preferably facing south or west - accelerates the drying process. Wind removes humid air from around the logs, while sunshine heats the outer wood and helps water move from the centre towards the surface.
A simple rule: shield your wood from rain above, but leave the sides as open as possible to air and light.
A common error is to wrap an entire stack in plastic. This holds in condensation and may leave the wood damp for months. It is better to protect only the top with a solid cover or tarpaulin and leave the sides uncovered.
How long does effective seasoning actually take?
Even after making all these improvements, firewood still needs sufficient time. For many commonly used hardwoods, the usual aim remains about two years between cutting and burning. It can be quicker in dry, windy areas and slower where the climate is damp.
| Wood type | Typical drying time* | Heat and burn profile |
|---|---|---|
| Softwoods (pine, spruce, fir) | 6–12 months | Dry rapidly, light easily and burn quickly with bright flames |
| Medium hardwoods (birch, ash) | 12–18 months | Moderate drying period and reliable, steady warmth |
| Hardwoods (oak, beech, hornbeam) | 18–24+ months | Slow-drying, high heat output and long-lasting embers |
*Figures assume well-split, well-ventilated stacking in a suitable climate.
Why certain logs appear to provide twice as much heat
When people claim that “this technique doubles the heat”, they are commonly comparing badly seasoned logs from a damp pile with well-seasoned, correctly split wood stored in a sunny, ventilated position.
In physical terms, the explanation is logical. The energy released by burning wood must perform two tasks: dry the log and warm the room. Every additional percentage point of moisture takes away some of that energy.
Moving from 35–40% moisture to under 20% can roughly double the useful heat you actually feel from each log.
In everyday use, this translates into fewer journeys to the wood store, less ash, less soot on the glass and a stove that responds more readily. Many users also say that, once their logs are properly dry, the secondary combustion systems in modern stoves finally work as promised: flames move across the top of the firebox and visibly smoky emissions are greatly reduced.
Keeping your valuable dry wood safe from winter weather
Achieving the right level of dryness is only part of the task. When winter storms begin, one careless storage decision can reverse months of drying. Well-seasoned logs placed directly on snow or beneath leaking gutters can draw moisture back in through their bark and cut ends.
The best winter arrangement is a covered but ventilated log store near the house. It should shelter the top and rear from wind-driven rain, raise the wood above ground level and retain at least one open side for air movement.
Practical scenarios: what change might you see at home?
Consider a small home that uses around 5 cubic metres of firewood annually. If the wood remains too wet, its occupants may still feel cold and end up burning nearer 7 or 8 cubic metres to stay comfortable. With properly seasoned and correctly split logs, the same household could reach the same comfort level using substantially less fuel.
Picture two identical stoves operating for six hours each day. One is supplied with wet wood, smoulders and coats its glass with soot. The other is fuelled by correctly seasoned hardwood. The second house is warmer, requires fewer refills and has a far lower risk of chimney deposits and fire. Preparation is the sole difference.
Essential terms to understand before lighting a fire
Moisture content is the proportion of water in a log, shown as a percentage of its overall weight. Firewood labelled “ready to burn” should normally have a reading below about 20%.
Creosote is the dark, sticky deposit created inside chimneys as smoke cools and condenses. Thick build-ups can catch fire and lead to chimney fires. Using dry wood at the proper temperature greatly reduces creosote formation.
Seasoning is the natural air-drying of wood, rather than factory kiln-drying. Correct seasoning requires time, storage space and careful stacking.
Combining this method with cleaner, safer burning
For anyone depending on a stove this winter, combining thoroughly dried wood with sound fire-lighting practices offers genuine benefits. Begin with small, exceptionally dry pieces, then add medium-sized logs once the stove is hot. Leave the air inlets more open initially to prevent smoky burning at low temperatures.
Some households now combine a small quantity of quick-drying softwood for kindling with dense hardwood for the main fire. This mix provides easier lighting, powerful early flames and embers that last later into the evening, provided the wood has been carefully split, stacked and seasoned through the simple method that so many users say has transformed their heating since they began using it this week.






Comments
• От 220 000 рублей — балочный условно-съёмный протез на имплантах https://adentalab.ru/
• От 100 000 рублей — покрывной условно-съёмный протез на имплантах https://adentalab.ru/
Изготовление зубных протезов — это процесс создания ортопедических конструкций, замещающих утраченные зубы https://adentalab.ru/
Для подбора и изготовления протезов необходимо обратиться к стоматологу-ортопеду https://adentalab.ru/
Протезы изготавливаются специалистом по зубному протезированию (зубным техником) в соответствии с инструкциями стоматолога и результатами сканирования https://adentalab.ru/
Стоимость
4 https://adentalab.ru/
Финальная обработка и установка протеза https://adentalab.ru/
Когда восковая модель удовлетворяет требованиям, начинается изготовление окончательной версии протеза из выбранного материала https://adentalab.ru/
После окончательной полировки протез готов к установке https://adentalab.ru/
Врач-стоматолог устанавливает съёмный зубной протез в полость рта пациента, давая рекомендации по уходу и корректировке https://adentalab.ru/
Виды
Leave a Comment