
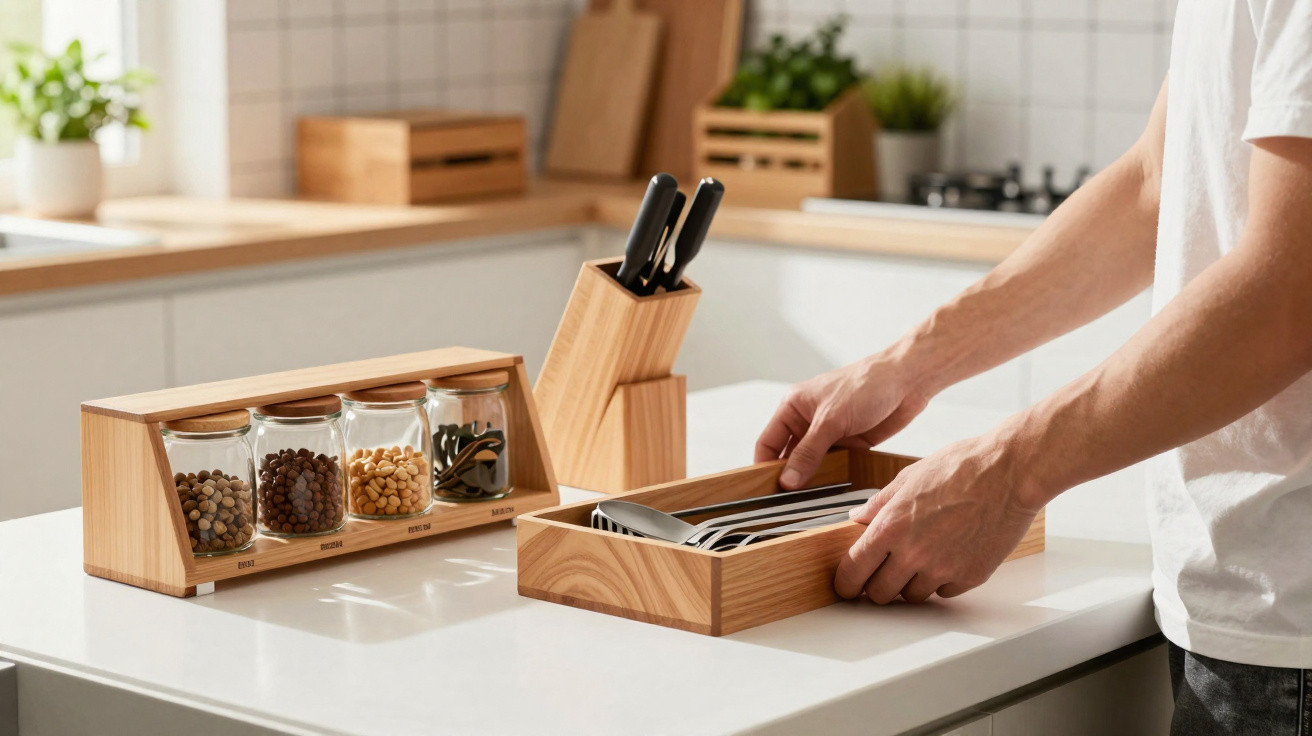
With a few leftover wooden boards, you can create a well-planned storage system.
Cluttered kitchen worktops, piles of pens and cables on a desk, or toiletries disappearing behind one another in the bathroom are familiar problems. At the same time, old shelving boards, pallet sections or offcuts from a previous furniture project often sit unused in the cellar. Those very leftovers can become 14 straightforward wood projects that bring structure to every surface - at virtually no cost and with plenty of upcycling appeal.
Why leftover wood is an unsung storage hero
Wood offcuts are frequently tossed into a corner and forgotten. Yet they are ideal for solving everyday storage dilemmas: where should oil bottles, coffee capsules, notebooks or charging cables go? Wood is sturdy, visually warm and easy to work with, even if you do not have a professional workshop.
“With a few carefully prepared boards, an overcrowded workspace can become a clearly organised area where every item has its own designated place.”
The appeal is that every piece can be tailored precisely to your home. Rather than relying on standard dimensions from a furniture shop, you can make solutions that fit unused corners, narrow recesses or the final gap between a wall and a cupboard.
Which leftover wood is genuinely suitable
Not every board from the cellar should automatically end up on a kitchen worktop. Before planning projects with wood offcuts, assess the material realistically:
- Suitable: solid furniture wood, clean plywood, leftover parquet flooring and untreated pallet boards.
- Best kept in the garden: treated outdoor structural timber, often greenish in colour or strongly scented.
- Use with care: very old paint finishes that are flaking or smell unusual.
Start by brushing the wood roughly and allowing it to dry thoroughly. Next comes sanding: begin with a medium grit, then move to a finer one, finishing at around 120-grit paper. A surprisingly attractive grain often emerges underneath.
For kitchens and bathrooms, a durable protective finish is worthwhile. Acrylic paint with a clear topcoat, or a hard-wearing wood varnish, helps prevent splash marks from water, oil and soap. In many local communities, open workshops use exactly these kinds of offcuts to make long-lasting shelving and small bookcases - proof of how robust reclaimed wood can be once it has been properly prepared.
14 leftover wood projects that clear worktops
The principle behind a tidier home is simple: group similar items, use vertical space and create levels. Instead of lining everything up side by side, you create defined zones that are practical and visually calmer.
Kitchen ideas
- Raised tray for oils and spices: Screw a narrow board onto two small wooden blocks, and bottles of oil and vinegar no longer sit directly on the worktop.
- Carry caddy for kitchen utensils: An open wooden box with a handle keeps wooden spoons, whisks and scissors together. When cleaning, the entire set can be moved aside in one go.
- Narrow wall-mounted spice rail: A single board can become a mini shelf above the worktop, with just enough depth for lidded jars.
- Vertical chopping-board holder: Two side battens and a base panel are enough to keep boards upright rather than leaning against the wall.
- Coffee storage system: Make a small compartment shelf or drawer from leftover wood to sort capsules or pods instead of leaving them loose in their box.
- Holder for coffee filters and napkins: Create two narrow compartments side by side, sized exactly for filter papers and paper napkins.
- Mini stand for washing-up liquid and brush: A small platform beside the sink keeps the sponge, washing-up liquid and hand soap out of standing water.
Desk organisation
- Organiser for pens and notebooks: Small dividers inside a wooden box separate pens, highlighters, scissors and sticky notes.
- Monitor riser with storage: Place a wide, sturdy board on two side panels, leaving room underneath for a keyboard, notebook or external drive.
- Charging station for smartphone and tablet: A board with slots holds devices, while a concealed compartment behind it houses an extension lead. Cables run through small openings.
- Wall organiser for post and paperwork: Shallow boxes made from thin plywood and mounted one above another sort bills, letters and to-do documents.
Bathroom and hallway storage
- Bathroom shelf for toiletries: A narrow raised platform on feet or battens keeps skincare products, toothpaste and razors neatly arranged along the edge of the basin.
- Wooden tray for keys and essentials in the hallway: A low box or small container near the door holds keys, sunglasses and loose change.
- Mini bookcase for a sideboard: Leftover boards can form an open box where cookbooks, art books or children’s books remain easy to reach.
How to fit leftover wood projects into every corner
Before reaching for the saw, use a tape measure. The key measurements are:
- available width on the worktop or desk,
- maximum depth, so there is still room to work comfortably,
- height beneath wall cupboards or the monitor.
A quick pencil sketch on paper makes planning the layout easier: where should compartments go, how high should the retaining edges be, and where are handle openings or cable cut-outs needed?
| Project | Difficulty level | Tools required |
|---|---|---|
| Washing-up liquid stand | very easy | Saw, sandpaper, wood glue |
| Monitor riser | easy | Hand saw or jigsaw, screws, drill |
| Charging station | medium | Jigsaw, drill for cable openings |
| Wall organiser for post | medium | Saw, set square, wall plugs and screws |
Most of these projects need only straight cuts. A basic hand saw, sanding block, wood glue and a few screws are entirely sufficient. If you are unsure, ask a DIY shop to cut the timber to size, then assemble it at home.
Colour ideas and everyday protection
The surface finish matters if your new storage helpers are to last. In the kitchen, wipe-clean painted finishes work well. In the bathroom, a water-based clear protective varnish prevents moisture from causing damage.
If you prefer a rustic appearance, use a wood stain to highlight the grain. In contemporary kitchens, matt pale shades create a calmer effect. A useful approach is to pick up colours from cupboard fronts, tiles or handles in your leftover wood projects, so they look like made-to-measure accessories rather than temporary fixes.
“Every completed piece does more than hold belongings; it also tells the story of a board that was once meant to be discarded.”
More benefits than simply better organisation
Putting leftover wood to good use protects your budget and saves trips to the furniture shop. It also reduces waste, as less material ends up in a skip. Many people also notice that a structured work surface helps them concentrate and makes it less likely that they will lose track of shopping or paperwork.
Once you have become accustomed to the first few projects, you soon view new wood offcuts differently. An old bed slat base is no longer thrown away, but provides slats for further shelves. A sawn-off table leg can become a foot for a new raised platform. Children can help with simple tasks such as sanding or sorting screws, giving them an introduction to practical making and materials.
It is useful to consider potential risks, including poor ventilation while sanding, old paint finishes and sharp edges. A dust mask, safety glasses and careful sanding reduce these risks considerably. If you are uncertain whether an old coating could be harmful, it is better to use that wood for cellar or outdoor projects rather than directly in the kitchen.
It becomes especially effective when wooden solutions are combined with other organisation methods: a raised kitchen tray alongside labelled clear jars, or a desk monitor riser paired with a digitally decluttered desktop. Step by step, this creates rooms where surfaces stay clear - even when everyday life becomes busy again.

Comments
No comments yet. Be the first to comment!
Leave a Comment