
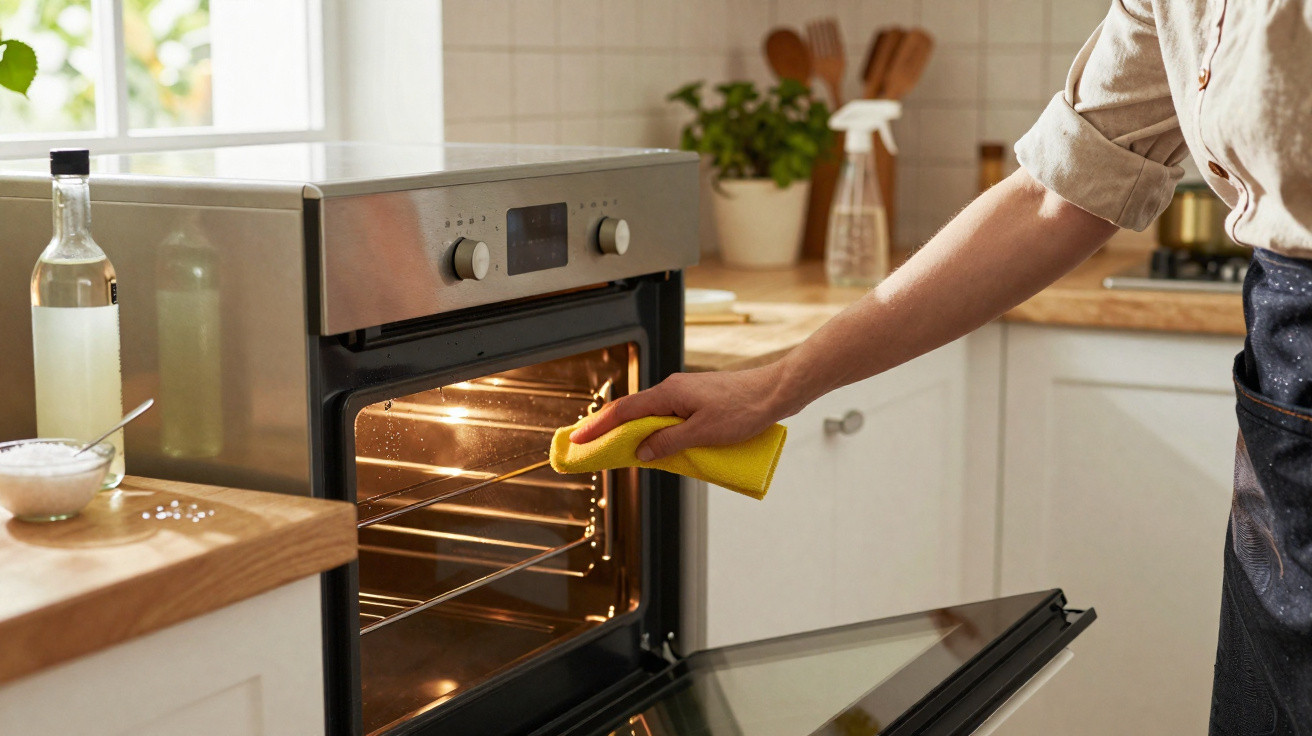
A genuinely clean oven need not require harsh products or exhausting scrubbing. A calmer, lower-cost approach is available for an everyday kitchen rather than a showroom.
Regular care helps the oven heat consistently, reduces energy use and prevents last night’s fish from affecting today’s pie. The following simple, low-tech method keeps on top of the job without aggressive chemicals or lengthy cleaning sessions.
Why oven upkeep matters
A frequently used oven handles lasagnes, roasted root vegetables, fruit crumbles and the occasional spill. With every heating cycle, layers of grease and caramelised sugar become tougher. They hold on to odours and coat metal surfaces, potentially extending preheating times and causing uneven browning. The result is unnecessary time and energy use, along with flavours that were never intended.
Cleaning routinely helps protect the enamel, maintain the glass in the door and stop residue baking onto seals. You notice the benefit when a tray of biscuits starts baking evenly again.
The two unexpected ingredients
White vinegar plus fine salt makes a mildly abrasive, odor-taming paste that lifts baked-on grease without scouring enamel.
It may seem almost too straightforward, but this combination strikes a useful balance. Vinegar breaks down greasy films and helps neutralise persistent odours, while salt supplies mild abrasion. Used together, they loosen dried-on sauces and brown marks from the door without producing fumes or artificial scents. The ingredients cost very little, keep well and can be mixed in a bowl and applied to the oven within a minute.
Step-by-step method
- Prepare the paste. Combine equal amounts of white vinegar and fine salt in a small bowl, aiming for a spreadable consistency similar to yoghurt. Add a little extra salt if it is too thin, or a splash of vinegar if it is too thick.
- Begin with a cold oven. Heat shortens the working time and can dry out the paste too quickly.
- Apply a generous layer. With a soft cloth or non-scratch sponge, cover the sides, rear wall and door glass. Keep clear of heating elements, fans and fragile seals.
- Leave it to work. Allow 15–20 minutes for the acid to loosen grease and for the salt to ease residue from the surface.
- Use only light pressure. Rub the most affected sections in small circles; the paste should do most of the work.
- Rinse and dry. Lift away the mixture using a damp cloth, wipe once more with clean water, then dry with a towel to restore shine, particularly on the glass.
For racks and trays: soak in hot water with a good splash of vinegar and a pinch of salt for 30 minutes, then wipe.
Precautions that keep you safe
Test the mixture on an inconspicuous spot first, particularly where the oven contains bare aluminium components. Do not let it touch gas burners, heating elements or gaskets. Open a window or ventilate the kitchen if smells bother you, and wear gloves if your skin is easily irritated.
Never mix vinegar with bleach. That combo releases dangerous fumes.
For a catalytic or pyrolytic oven, consult the manufacturer’s manual. Gentle manual cleaning between automatic cleaning cycles can reduce reliance on an energy-intensive programme.
Alternatives when stains fight back
Vinegar and salt will shift most residue. If the oven has accumulated grime over months of roasting, use one of the following methods occasionally.
- Baking soda paste: Combine three tablespoons of baking soda with one tablespoon of water. Apply it, leave for 30 minutes and then spray with vinegar to create a light foam. Wipe it away. This is useful for carbonised marks on the oven floor.
- Concentrated washing-up liquid: A few drops mixed into hot water emulsify grease during weekly touch-ups without putting enamel under strain.
- Ammonia vapour method: Reserve this for serious cases. Put a small heatproof bowl containing a little household ammonia on the lower shelf of a cold, switched-off oven, then place a second bowl of very hot water above it. Shut the door for an hour. Thoroughly air the room before opening the oven and wear gloves. Never combine ammonia with anything else.
- Household pumice stone: This can tackle thick steel racks and heavily soiled trays. Do not use it on glass or enamel, as permanent micro-scratches can result.
Quick comparison at a glance
| Method | Best for | Wait time | Notes |
|---|---|---|---|
| Vinegar + salt paste | General grime, door glass haze | 15–20 min | Low odour, easy rinse |
| Baking soda paste | Carbonised floor spots | 30 min | Add vinegar spray to finish |
| Dish soap in hot water | Weekly upkeep | 5–10 min | Gentle on enamel |
| Ammonia vapour | Severe, long-neglected buildup | 60 min | Strong caution and ventilation |
| Pumice stone | Heavy racks and trays | As needed | Avoid glass and enamel |
Why this mix works
Vinegar contains acetic acid, which helps dissolve fatty films and starchy residue so that they come away with little force. Salt provides microscopic friction: its grains are firm enough to shift grime, yet, when used gently, not sharp enough to damage hard enamel. This creates a balanced cleaner that rinses away quickly and does not leave a perfume behind.
There is a cost benefit, too. One bottle of white vinegar and one bag of salt can cover months of kitchen cleaning tasks. That means fewer specialist products cluttering the cupboard beneath the sink and fewer fragrances competing with food.
How often to clean without hating it
Wipe the oven when it is warm rather than hot. After roasting, leave the door slightly open and, once the temperature has dropped to a safe level, give the interior a pass with a damp cloth. Fresh splashes come away before they carbonise. Carry out a more thorough clean every two to four weeks, depending on how often the oven is used. Covered casseroles produce fewer splatters, while a drip tray beneath fatty cuts reduces future work. Door glass requires the closest attention because it collects airborne oils during every preheat.
When odours remain after cleaning, rinse once again with clean water and leave the door ajar for a few minutes. Vinegar can help neutralise smells, but airflow completes the process.
Small gains that add up
Consistent heat makes cooking times more dependable. A clean oven cavity and clear glass make it easier to assess whether food is done without opening the door, helping preserve the temperature and avoid heat loss. Across a month of regular cooking, avoiding repeated preheats caused by checking through the door can remove meaningful minutes from cooking time. This is easier on both your schedule and energy bill.
Extra tips many home cooks miss
For fan ovens, remove the rear cover only where the manual permits it. With the oven cold and unplugged, vacuum loose crumbs through the vent slots. Clearing the fan route improves airflow. Clean rubber gaskets with only warm water and a cloth; strong cleaning products can shorten their lifespan and may lead to heat escaping.
If you entertain regularly, set a modest calendar reminder after major cooking weekends. A 20-minute vinegar-and-salt clean is preferable to an intensive scrub once each season. Renters may also wish to photograph the interior once it is clean, as this records good care and could be helpful later with deposits.
Short on time? Treat the door only. Clean glass instantly improves visibility and makes the whole oven feel fresher.
There is another practical use for the method: before running a pyrolytic cycle, quickly wipe away loose grease with vinegar and salt. The automatic programme can then turn genuinely stuck-on residue to ash, potentially reducing the high-heat cycle required. Be gentle with catalytic liners; they absorb light splashes during normal cooking, and a soft wipe helps support that function.
There are no magic solutions beneath the sink, but some combinations deserve space on the shelf. Vinegar and salt make oven cleaning straightforward, inexpensive and surprisingly satisfying. Once the glass is clear again, you can watch crusts brown properly, which is half the pleasure of cooking at home.



Comments
No comments yet. Be the first to comment!
Leave a Comment