
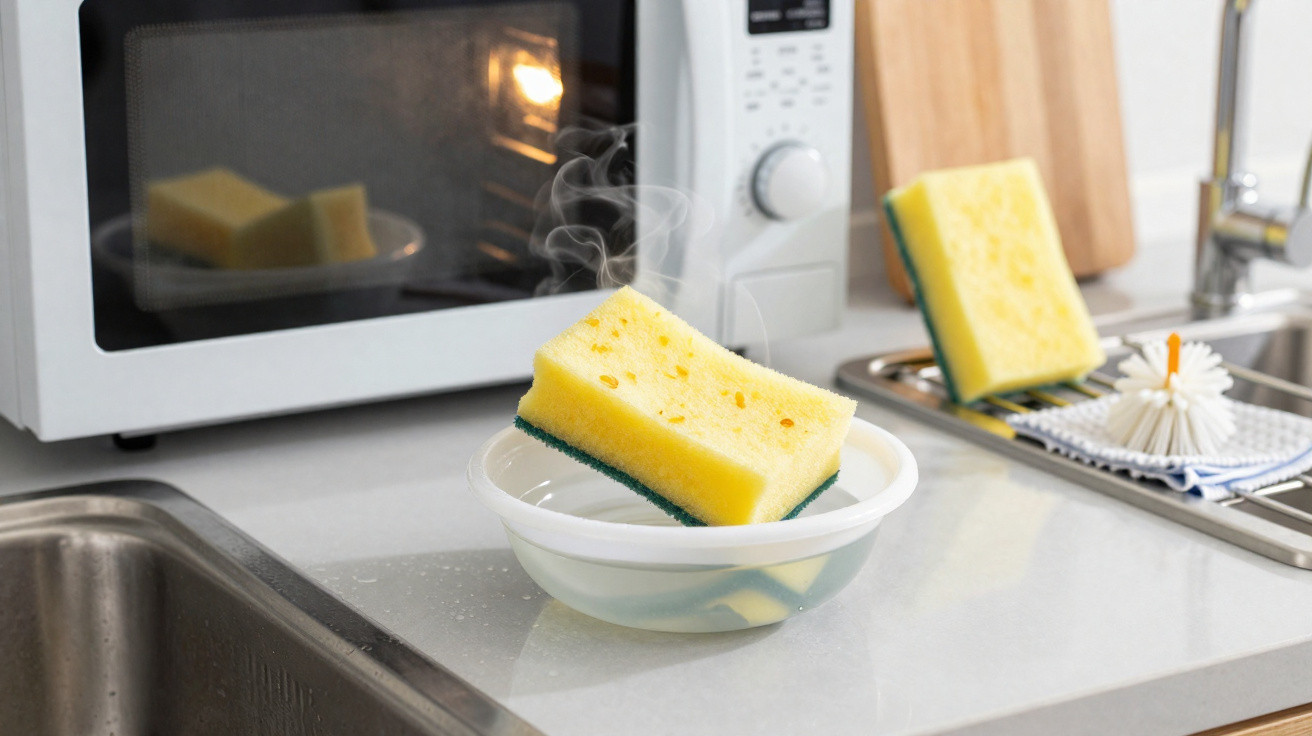
It begins with the sponge. We reach for it to wash plates and pans and wipe up spills, then leave it wet beside the sink. That familiar habit encourages dirt and unpleasant smells. A straightforward microwave heat treatment has become a key part of a growing trend in home hygiene.
The unpleasant reality of kitchen sponges
Sponges collect food proteins, oils and sugars. These leftovers provide nourishment for microbes. Warm kitchens and pooled water accelerate their growth. This can lead to a sour odour and an increased risk of cross-contamination, particularly on chopping boards, handles and taps.
Cellulose sponges can retain dampness for hours. Scrubbing pads hold crumbs far below their surface. Although a quick rinse is useful, it seldom reaches the internal layers. They also take a while to dry, allowing bacteria to continue multiplying in the meantime.
A damp sponge offers perfect conditions for microbes: food, warmth and water. Break that trio and you cut the risk fast.
Why microwaving a sponge can be useful
Microwave energy warms the water held within the sponge. This heat can deactivate many common bacteria. It also removes some moisture, slowing fresh microbial growth. When used correctly, this method can reduce odours and give the sponge a little extra use before it is thrown away.
What heat actually does
Heat causes bacterial proteins to denature. It also harms cell membranes. This creates less favourable conditions for any microbes that remain. With less moisture available, fewer cells are able to recover after use. However, the benefit does not last, so regular care remains important.
- Lowers the amount of live bacteria on both the surface and within the sponge.
- Reduces stale, musty odours associated with microbial activity.
- Can lengthen the period a sponge remains usable before replacement.
How to use the microwave method safely
Prepare with care, as the sponge will be extremely hot afterwards. The aim is to heat it fully while avoiding any fire hazard.
- Read the label first. Never microwave sponges containing metal fibres or metallic dyes.
- Saturate the sponge until water drips from it. Squeeze it once so that it remains soaked rather than dry.
- Put it into a microwave-safe bowl, then add roughly 150 ml of clean water.
- Microwave on high for 90–120 seconds. Smaller microwaves may require the full two minutes.
- Keep clear and leave it to stand for 2 minutes, as steam may burn your skin.
- Use tongs to remove it. Give it a short rinse in cool water, wring it out and leave it upright to air-dry.
Key rule: soak the sponge. A dry or nearly dry sponge can scorch or catch fire in seconds.
Precautions and warning signs
Do not use this approach with scouring pads that may contain concealed metal. Avoid heating sponges carrying heavy chemical residues. Throw away any sponge that remains smelly after heating. Never walk away while the microwave is operating. Stop the cycle if smoke appears, and clean the microwave following any splashes or spills.
Food-safety advice in certain countries increasingly favours replacing sponges over sanitising them on a regular basis. Domestic microwaves vary in both power and heat distribution, so results can be inconsistent. Regard this as a temporary measure rather than a guarantee.
Does it replace proper cleaning?
No. Heat treatment can help, but it cannot make an ageing sponge sterile. Change sponges regularly and use separate tools for higher-risk jobs. A firm washing-up brush dries more quickly than a sponge. Microfibre cloths can be placed directly into a 60°C wash.
| Method | How it works | Pros | Cons | Best use |
|---|---|---|---|---|
| Microwave | Warms water within the sponge through brief, intense exposure | Quick; reduces odour; requires no chemicals | Fire risk when dry; uneven heating; unsuitable for metal pads | A fast refresh for a wet sponge without metal |
| Boiling water | Five minutes at a rolling boil | Consistent heat; inexpensive; no microwave required | Takes hob time; may wear out the sponge sooner | More intensive sanitising at home |
| Dishwasher | Put the sponge on the top rack during a hot cycle | Hands-off; fits into normal washing-up | Results differ by machine; the centre may not become hot enough | Regular refreshing alongside the weekly dishwash |
| Diluted bleach | Soak for 5 minutes in 0.1% bleach, then rinse | High kill rate; reliable | Odour; chemical handling; requires thorough rinsing | A deep clean where smells continue |
| Regular replacement | Dispose of worn sponges on a fixed schedule | Removes biofilm and residue completely | Expense; unnecessary waste if changed too frequently | The main approach for busy kitchens |
Eco-friendly choices that stay fresher
Opt for cellulose sponges made with plant pulp or recycled fibres. Many decompose more quickly once discarded. Copper scrubbers resist rust and dry rapidly. Silicone scrubbers rinse easily and do not retain water, helping them avoid sour smells. Steer clear of coatings containing antibacterial chemicals that may be rinsed into drains.
Air-drying is important too. Choose a rack that holds sponges upright and allows air to circulate around every side. Fast drying slows microbial growth more effectively than fragrance additives can.
How often should you replace a sponge?
Frequent users should replace their sponge every 7–10 days. Those who use one less often may extend this to two weeks. Change it earlier if raw meat spills occur. A sponge that still smells after washing has developed a biofilm that you are unlikely to remove. Splitting large sponges in half can make a pack last longer while keeping each piece fresher.
If it smells, it is done. Odour signals a mature biofilm that household steps rarely remove.
Common mistakes to avoid
- Putting a dry or almost dry sponge in the microwave.
- Heating scouring pads that contain hidden metal threads.
- Microwaving on high for more than two minutes.
- Immediately picking up a hot sponge with bare hands.
- Using one sponge for both raw meat juices and everyday washing-up.
- Leaving the sponge flat in standing water or on a surface where drainage is blocked.
A straightforward kitchen hygiene upgrade
Create a rotation using two sponges marked “A” and “B”. Use one while the other dries completely. Heat-treat the damp sponge after the evening wash, then alternate them each morning. Dispose of both after two weeks. This routine reduces the time they remain wet and distributes wear.
You could also divide tasks between tools. Reserve one cloth for worktops, a brush for pans and paper for raw-meat mess. Doing so decreases the microbial load collected by your main sponge. Your microwave will then have less to deal with, while your sink will smell fresher.

Comments
No comments yet. Be the first to comment!
Leave a Comment