
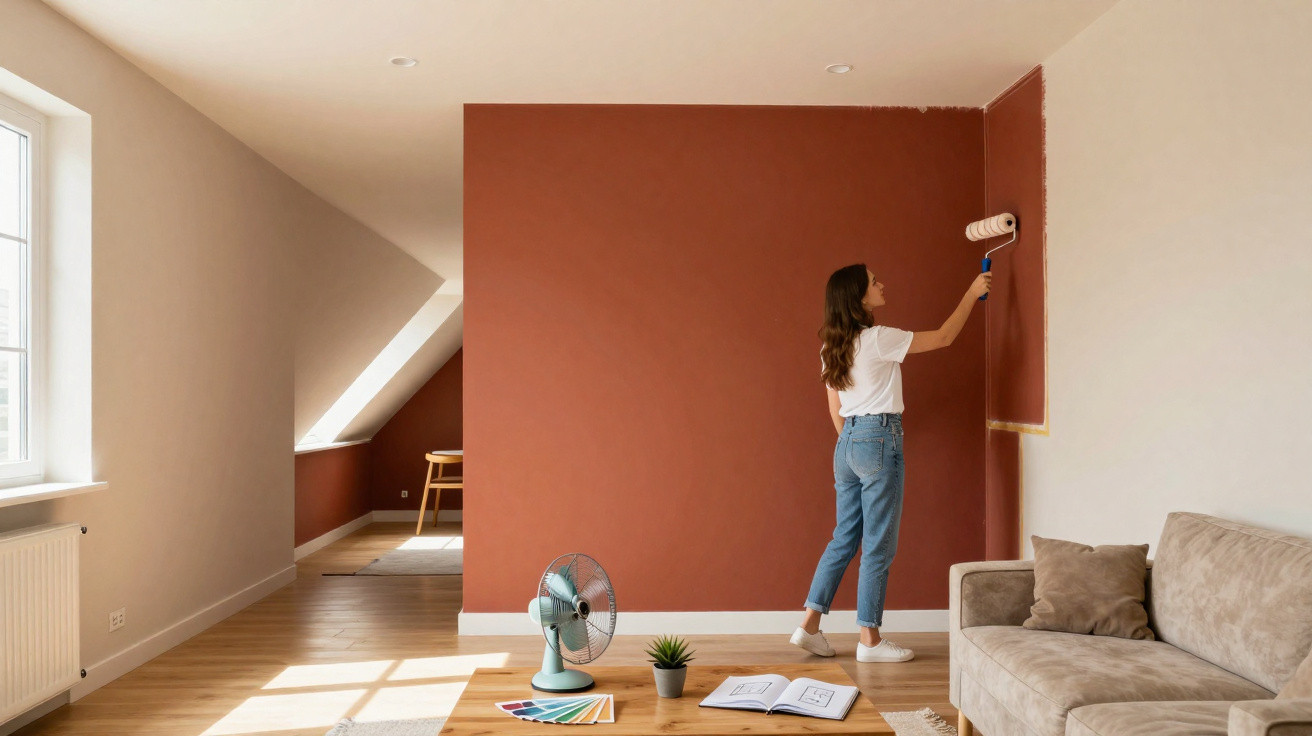
Many homes across German-speaking countries share the same issue: the floor plan may work, yet the room simply does not feel right. It might be too long, too narrow, too tall or too visually busy – while structural alterations would be costly. A distinctive painting technique inspired by make-up contouring now offers a solution: carefully placed colour can visually shift walls, ceilings and alcoves without moving a single brick.
The principle behind Room Contouring
In make-up, contouring uses light and dark shades to shape the face. That very same principle is now being applied to interior design. Rather than cheekbones and noses, walls, ceilings and architectural features receive an “optical lift”.
“Room Contouring means not simply painting beautifully, but placing colour strategically to control how a room is perceived.”
Colour specialists describe the effect like this: darker shades make surfaces appear to recede and create depth. Lighter shades seem to advance and make an area feel larger. The brain processes these contrasts automatically, so the room appears different even though not a single centimetre has been added.
Colour gradients, edges and transitions can draw attention to selected surfaces, visually narrow others or make them appear to “disappear”. A plain box-like room suddenly gains definition, a long narrow space feels more relaxed, and an excessively high room becomes cosier.
How colour deliberately deceives the eye
The result is based on a straightforward visual process: our eyes look for contrasts and boundaries. When the eye sees a light surface next to a dark one, the brain reads it as being “further away” or “closer” depending on the shade.
- Dark colours appear heavier, visually recede and add depth.
- Light colours feel lighter, come forward and open up a room.
- Soft transitions make edges seem gentler and rooms appear calmer.
- Strong contrasts create deliberate focal points and guide the eye.
Used intelligently, this can make walls appear to move – for example, visually shortening an overly long wall or stretching a cramped room without shifting any furniture.
Solutions for narrow, oversized or awkwardly shaped rooms
A large lounge with a cold atmosphere
In very large living rooms, many people feel somewhat lost: there is extensive wall space, a high ceiling, and the room echoes, quickly taking on the character of a gallery. Designers often turn to dark wall colours in this situation. Deep blue, green or taupe on the main walls visually reduces the volume and restores a feeling of comfort.
The ceiling does not have to remain white, either. A subtly contrasting muted shade – such as warm greige – can gently define the transition into adjoining spaces. This keeps the overall scheme connected while giving each zone its own atmosphere.
A narrow hallway that seems endless
Hallways are among the most common problem areas. They are long, tight and usually poorly lit. Room Contouring can make a real difference here:
- Paint the end wall in a darker shade – it will appear closer, visually shortening the corridor.
- Keep the long side walls lighter – they will seem to sit further apart.
- Consider making the upper section of the walls slightly darker than the lower section – this gently lowers the perceived height and makes the space feel less tunnel-like.
With only a few colour boundaries, an endless corridor becomes something like a picture gallery, making it noticeably more pleasant to walk through.
A sloping ceiling that feels oppressive
A loft room with a low sloping ceiling can quickly feel claustrophobic, particularly when every surface is painted in one colour. This approach works well instead:
- Paint the vertical walls in a warm mid-tone.
- Keep the sloping ceiling lighter – this draws the eye upwards and makes the room feel airier.
- Define only the line between the wall and the slope with a slightly darker shade – it adds structure without becoming oppressive.
The result is not a “roof cellar”, but a comfortable retreat where people enjoy spending time.
Highlighting architectural details with intention
Room Contouring does more than correct unflattering proportions; it can also give greater prominence to distinctive features, such as an ornamental ceiling, an archway, a built-in alcove or a large expanse of windows.
Take a bay window in a bedroom as an example. Rather than painting it in the same colour as everything else, a warm light shade can bring its projection forward. The eye is naturally drawn there, the depth is emphasised, and the bay becomes the room’s focal point.
“A bay window picked out with carefully chosen colour can act like a natural light source – even on grey days.”
The same sort of accent can be created with doors, fitted cupboards or shelving. A door in a satin finish that is slightly darker than the surrounding matt pale wall reads more like a piece of furniture than a purely practical building element.
The role of sheen levels: matt versus gloss
For Room Contouring, colour alone is not what matters; the surface finish is equally important. The sheen level determines how much light is reflected and, in turn, how three-dimensional a surface appears.
| Finish type | Effect on light | Use in Room Contouring |
|---|---|---|
| Matt | Reflects very little light and appears calm | Ideal for large surfaces intended to recede or gain depth |
| Velvet / eggshell | A slight sheen with soft reflection | Well suited to walls that need a little more liveliness without looking glossy |
| Satin / gloss | Strong light reflections that emphasise every edge | Use only in small areas for details that should stand out |
For the actual “modelling” of a room, experts largely recommend matt or velvety finishes. They absorb light, strengthen shadows and make corners and edges appear softer. High-gloss paints, by contrast, reflect strongly and can undermine the illusion by making every imperfection stand out.
How to plan your own Room Contouring scheme
Before making the first brushstroke, it is worth looking at the room as you would a face in the mirror. Which areas should recede, and which should come forward?
- Choose your viewpoint: Assess the room from the position it is most often seen from – usually the entrance or the sofa.
- Identify problem areas: Look for a wall that is too long, a ceiling that is too high, a tight corner or an overly dominant feature.
- Define the “highlights”: Select windows, alcoves, fireplaces or shelving walls that can be emphasised.
- Choose colour pairs: One light shade and one clearly darker shade from the same colour family will look harmonious.
- Decide on sheen levels: Use matt finishes for surfaces, reserving satin or gloss for details only.
Test strips or small sample patches in different locations will quickly reveal whether the intended effect is working. Light changes throughout the day, so it is best to examine test areas both in the morning and evening.
Common mistakes and how to avoid them
As with make-up, Room Contouring can be overdone. Certain pitfalls appear again and again:
- Too many contrasts: Giving every wall a different intense colour creates a restless, tiring effect.
- The wrong focal point: Darkening the wrong wall can make the room feel even narrower.
- Gloss in the wrong place: Shiny paint across large surfaces highlights every ripple in the plaster.
- Ignoring daylight: A shade that looks excellent in a north-facing room can seem harsh very quickly in a south-facing one.
Anyone feeling unsure can begin with smaller areas: a reading corner, a short stretch of hallway or one projecting section of wall. The learning value is high and the risk remains low.
Why this technique is currently so popular
Room Contouring is perfectly suited to a time when many people want to improve their homes without undertaking major building work. The technique:
- costs little compared with renovations,
- can be carried out in stages,
- works in rented homes because everything can be painted over again,
- allows tailored solutions for widely differing floor plans.
There is another benefit: colour affects more than appearance; it also shapes how a place feels. A well-modelled room often seems calmer and more clearly organised. It is easier to find your way around and easier to feel “at home” – even when the floor plan is far from ideal.
Those who try their first experiments soon discover how powerfully a handful of graduated shades can influence the mind. With a little confidence and a paintbrush, many unloved rooms can be turned into surprisingly harmonious favourite spaces.





Comments
No comments yet. Be the first to comment!
Leave a Comment