
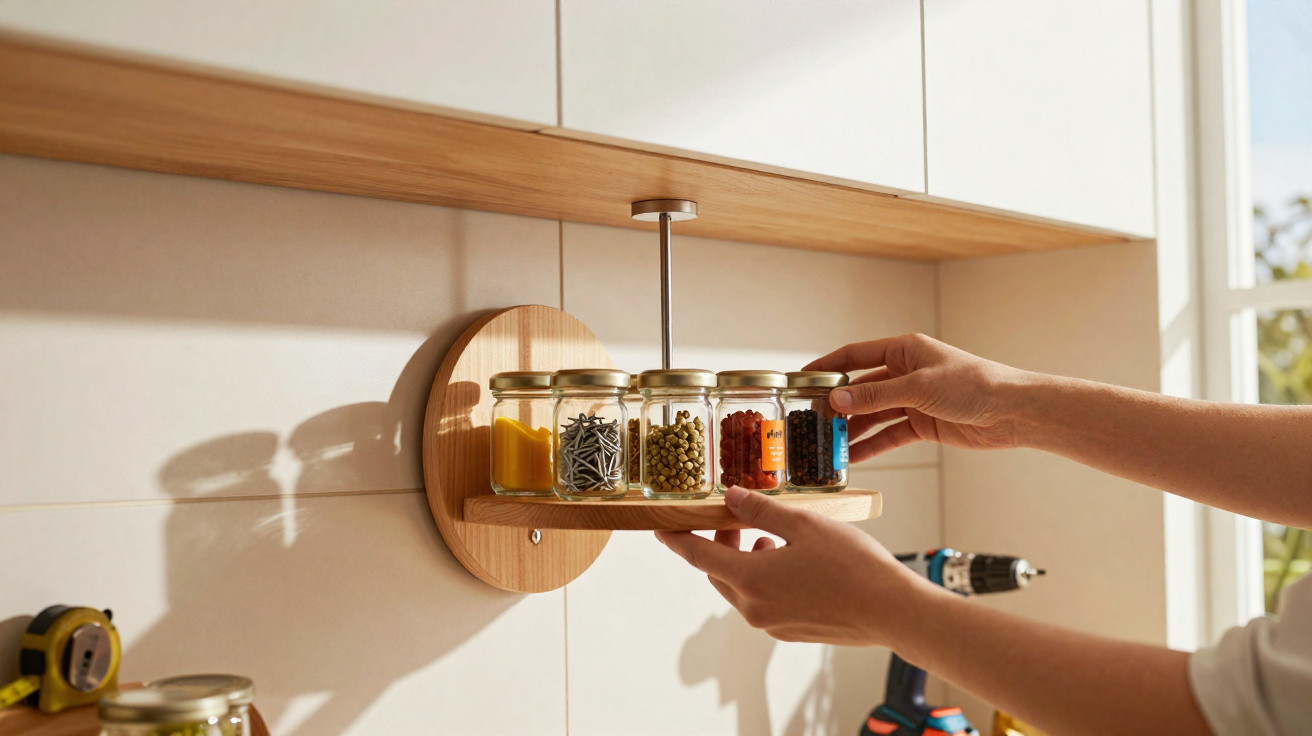
Kitchen drawers in many homes are bursting with spices, clips and miscellaneous bits and pieces – yet one straightforward trick can bring instant order.
Anyone cooking in a compact kitchen, a student flat or the bustle of family life will recognise the issue: packets split open, elastic bands go missing and spice jars become wedged together. This smart DIY idea makes use of a seriously overlooked area: the underside of cupboards and shelves. Recycled miniature jars are suspended beneath the furniture like a small carousel.
The jar trick: concealed storage beneath the cupboard
The principle is uncomplicated, but it can make a real difference in daily life. Empty jam jars or baby-food jars are given another use. Their lids are screwed to a wooden strip, which can rotate and is fitted below a wall cupboard, shelf or directly onto a wall.
“With just a few simple steps, a chaotic spice compartment becomes a rotating mini rail with hanging jars – visible, within easy reach and space-saving.”
The jars hang upside down in a neat row and can simply be unscrewed and replaced from below. Space underneath the cupboard that would otherwise go unused becomes a tidy store for small items. In particularly small kitchens, every centimetre matters, both horizontally and vertically.
How the rotating system works
At its heart, the construction uses three wooden parts and a metal bolt as its axle:
- one long central wooden strip, with the lids attached to it
- two wooden pieces at either side to form the support
- a sturdy bolt or threaded rod passing through all three pieces
The side pieces are fixed beneath the cupboard or to the shelf, while the central strip rotates around the bolt. This makes it easy to swing every jar forwards. The strip must not be too narrow: the lids need sufficient support, and there must still be room to get your fingers between the jars.
Materials list: what you actually need
This project only calls for basic DIY-shop supplies, and many of them may already be stored in the garage or shed:
- small glass screw-top jars with metal lids, such as jam, baby-food or spice jars
- a rectangular wooden strip to carry the lids
- two additional pieces of wood for the side supports
- wood screws for the lids and installation
- a bolt or threaded rod with nuts and washers
- sandpaper, plus wood stain or paint if desired
- a drill, screwdriver or cordless drill driver, pencil and tape measure
The length of the strip depends on the available space and number of jars. In practice, a quantity divisible by four works well, for example 12, 16 or 20 jars. This keeps the spacing even and prevents the construction from becoming unbalanced on one side.
Step by step: building the jar carousel
1. Cut, sand and protect the wood
Start by preparing the timber. The side pieces should be noticeably longer than the height of the jars. This allows the central strip and its jars to turn freely without hitting the worktop or wall.
- Cut the wooden strips to the required size, or have them cut at a DIY shop.
- Smooth all edges and surfaces thoroughly with sandpaper.
- Apply stain, varnish or paint to the wood, then allow it to dry completely.
Treating the surfaces protects them from cooking vapour, grease and moisture. It also extends their lifespan and simply looks better.
2. Position the lids with millimetre precision
Next, fit the lids onto the central strip:
- Measure the strip and mark out evenly spaced positions.
- Leave enough room between the lids to grip and turn a jar easily with your fingers.
- Secure each lid centrally using two to three small screws.
The lids need to be firmly fixed, as filled jars will later hang from them. If in doubt, test a single jar first to see how the material responds when the screws are tightened.
3. Install the rotating axle and fit the support
The drilled holes are crucial if the strip is to swing smoothly. The holes in the central strip should fit the bolt closely, while those in the side pieces should be slightly larger. This holds the bolt securely at the centre while giving the outer holes enough play for rotation.
Then:
- pass the bolt through one side piece, the central strip and the second side piece
- secure it with nuts and washers
- test the movement until the strip turns easily without wobbling
Only then should it be installed beneath a cupboard, under a wall shelf, inside a wall cupboard or directly on the wall. Strong, load-bearing screws are essential, especially when numerous jars will be filled.
What the mini jars can be used for
Kitchen organisation: spices, seeds and dry ingredients
The benefit in the kitchen is obvious: each jar can hold a spice blend, herbs, seeds or nuts. Add labels or writing to the side or base of each jar, depending on which position is easiest to read when looking up from below.
With one turn, all curries, herbs, types of sugar or cake decorations are in view. Nothing topples over and nothing disappears into the far corner of an overcrowded drawer.
Craft area, home office and children’s bedroom
The system is equally well suited to crafters, DIY enthusiasts and children:
- beads, sequins, buttons and sewing needles
- paper clips, elastic bands, drawing pins and replacement leads
- small toys, collectible figures and marbles
USB sticks and adapters can even be organised in a home office. In a child’s bedroom, small objects are kept safely stored yet visible – a useful way to reduce lost items and trip hazards.
Workshop and garage: keeping small parts under control
Anyone who screws, repairs or makes things knows how easily nails and screws end up scattered around. The jars provide room for:
- screws sorted by length
- wall plugs, washers and nuts
- small spare parts, fuses and clips
Mounted above a workbench or on a shelf over the worktable, the rotating strip creates a clear, orderly system. Small items are no longer loose in drawers but hang visibly within reach.
Tips for safe, practical use
Before filling every jar, it is worth testing the empty system. You will quickly see whether the strip swings freely and the fixings hold securely. If you intend to store heavier contents, you should:
- avoid choosing overly large jars
- use only sturdy, undamaged lids
- check that the cupboard base or wall can carry the load
Hygiene is another consideration. Kitchen jars should be wiped on the outside regularly so that grease does not build up. Herbs and spices are best kept somewhere relatively dry and not too hot, so a position directly above the hob is unsuitable in the long term.
Why this project is particularly worthwhile
This small DIY project not only saves space but is also kind to the budget. Rather than buying new plastic containers, existing jars gain a second life. That means less waste, fewer new purchases and a personal touch in the home, as every jar can look different according to its label and contents.
The design is also flexible: if you later want to store something else, simply swap the jars. The strip stays in place while its purpose changes. During changing stages of life – moving into a smaller home, setting up a new home office or welcoming a growing family – this kind of modular system can quickly become an unobtrusive organisation helper.
If you like the idea, you can even expand the principle: one strip in the kitchen, one in the craft area and one above the workbench. The result is a consistent, easy-to-understand storage system that keeps small items visible and noticeably frees up drawers.



Comments
No comments yet. Be the first to comment!
Leave a Comment