
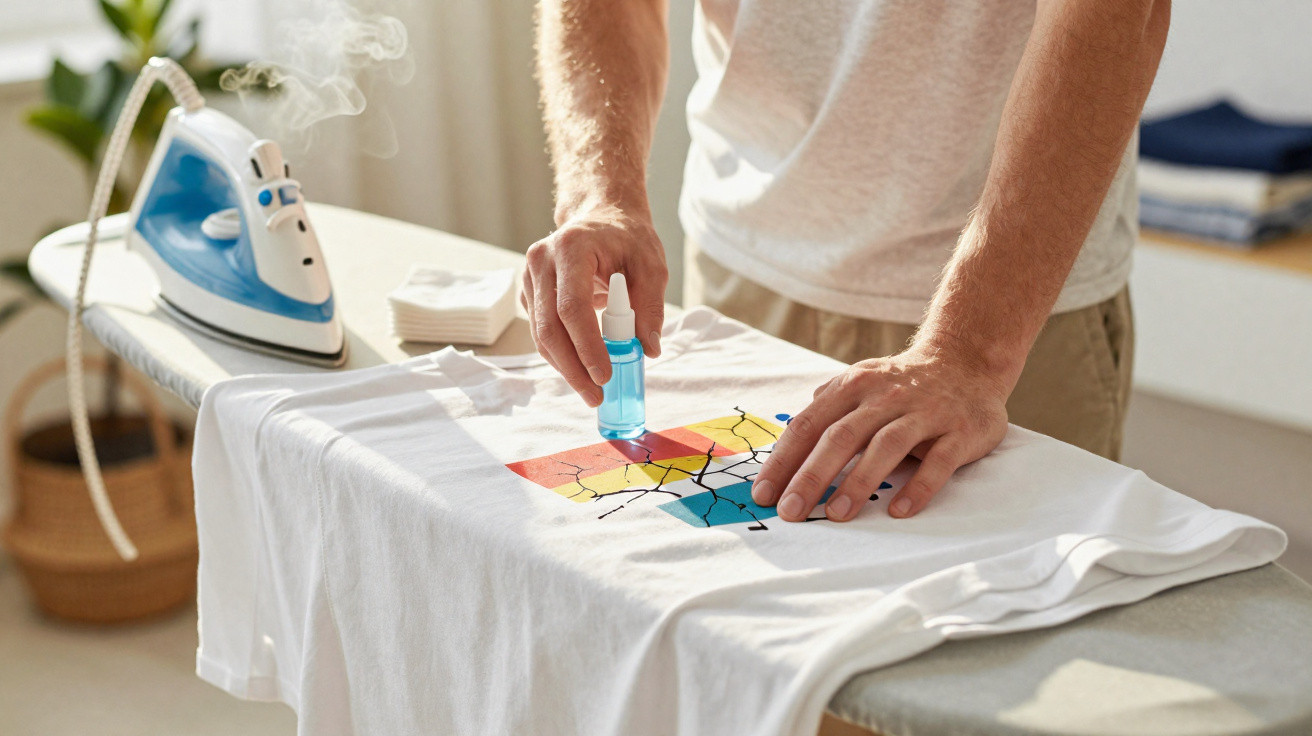
This is precisely where the rescue begins.
Many T-shirts end up in the bin simply because their print looks cracked, even though the fabric itself remains in excellent condition. What few people realise is that a simple bathroom product, used alongside an iron, can visibly smooth flaky prints and give a shirt several more years of wear – with no professional equipment and no sewing skills required.
Why printed T-shirts quickly start to look worn
Whether it is a band T-shirt, a festival souvenir or a club logo, printed T-shirts rarely age evenly. The cotton fabric often lasts for years, whereas the print can crack after only a few washes. Fine splits tend to appear first in areas where the fabric is constantly stretched and moved – across the stomach, chest and middle of the back.
On many shirts, the design consists of a vinyl-like or rubber-like layer pressed onto the fabric. Over time, this material hardens, becomes brittle and splits a little more with every movement. As a result, the appearance can suddenly shift from “a much-loved vintage piece” to “I cannot really wear this any more”.
“The good news is that a cracked print does not automatically mean the shirt is beyond saving – the surface can be made more supple again in a targeted way.”
This is the principle behind a straightforward technique frequently shared in sewing forums and upcycling groups: a solvent is used to soften the print slightly before an iron is used to settle it back into place.
The unexpected bathroom helper
The key product for this repair is acetone, which is often found in nail varnish remover. It reacts with the vinyl layer of the print, temporarily making it softer while having little impact on the fabric itself, provided it is used sparingly.
What you need to save a T-shirt
- an old but clean cotton cloth or tea towel
- acetone or acetone-based nail varnish remover, preferably without added oils
- a small piece of cotton wool, a cotton pad or a cotton cloth
- an iron with adjustable temperature settings
- a smooth, heat-resistant surface, such as an ironing board or a table with protective padding
Each item serves a purpose: the cotton pad helps control the solvent, the acetone makes the print more flexible, the protective cloth shields the design from direct heat, and the iron helps fuse the softened layer back together more evenly.
Step by step: making the print smoother again
1. Prepare and test the area
Lay the shirt flat on the ironing board with the print facing upwards. Before beginning, carry out a small test on an inconspicuous part of the design using a minimal amount of acetone to see how the material responds. Stop immediately if the print discolours significantly or starts to dissolve.
2. Soften the print carefully
Lightly moisten a cotton pad with acetone. It should be damp rather than dripping wet. The aim is to treat only the surface of the printed layer, not to soak the entire fabric.
“Rather than rubbing, gently dab the area – this helps keep already flaky sections in place.”
Now dab the cracked section gently, working slowly from one small area to the next. Within seconds or a few minutes, the print should begin to soften. It will feel less rigid and almost rubbery. If you are unsure, pause briefly and check it with your fingertip: once the surface feels more flexible, the amount used will usually be sufficient.
3. Add a protective layer
Before bringing in the iron, place a thin cotton cloth or old tea towel over the print. This layer acts as a safety barrier:
- it stops the vinyl from sticking directly to the iron’s soleplate
- it distributes the heat more evenly
- it reduces the risk of overheating or distorting the print
The cloth should lie flat without creases, so that no fresh lines or edges become imprinted on the design.
4. Use heat to “push together” the cracks
Set the iron to a medium heat setting and turn off the steam. Steam may create droplets that leave marks. Place the iron over the cloth and print briefly at first, almost as though using a gentle stamp. Do not move it around forcefully; instead, set it down carefully and slide it only lightly.
“With the heat, the particles in the print layer that were softened by the acetone bond together a little more firmly again.”
Repeat this process carefully. Gradually, many of the fine cracks will look smoother and the overall print will appear more uniform. The key point is to use several short applications rather than one session that is too hot or too long.
Mistakes you should definitely avoid
Impatience can cause permanent damage. Common pitfalls include:
- Too much acetone: Parts of the print may lift away or smear.
- Too much pressure while rubbing: Cracks can tear open completely and small pieces may break off.
- Direct contact with the iron: The print can melt, develop an unnatural shine or stick to the iron.
- Excessive heat: The fabric may become shiny in places or discolour.
If you are uncertain, test the technique first on a shirt that matters less to you. This will help you become familiar with how the material behaves.
Keeping the “new” print looking good for longer
Once the print is smoother again, it is worth treating it more gently in future. A few simple habits can noticeably extend its lifespan:
- turn printed T-shirts inside out before washing
- avoid very hot washes; 30°C is usually sufficient
- use fabric conditioner sparingly, as it can affect the printed layer
- do not “cook” it in a tumble dryer; air drying is preferable
- continue to iron the print through a cloth on a medium setting
The print layer is particularly sensitive after a “rescue operation”. Treating the shirt roughly again straight away can quickly undo the improvement.
When a repair is worthwhile – and when it is not
This method is particularly suitable for:
- shirts with moderate or fine cracks in the print
- prints that feel hard and slightly brittle
- favourite pieces you would like to wear for another year or two
The effort is less worthwhile if the print is already peeling away over large areas or the fabric itself has holes. In that case, upcycling is often the better option: the motif can be turned into cushion covers, fabric bags or patch details for other garments.
Why acetone works – and when to take care
Acetone is a type of solvent. It can dissolve certain plastics and coatings without strongly dissolving cotton at the same time. That is exactly why the print reacts more noticeably than the fabric. Even so, it should be handled with care: in large quantities, it can affect colours, irritate the skin and should not be inhaled in enclosed spaces.
Anyone with sensitive skin should wear gloves and ensure the room is well ventilated. Nail varnish remover containing conditioning oils can work in principle too, but it may leave residues behind. If there is a choice, opt for a simple product without a mix of fragrances and oils.
Giving your wardrobe more life with small tricks
Repairing a cracked print is just one example of how clothing can be used for longer with a few simple steps. Many items appear to be “finished” merely because one detail is no longer perfect. A button, a seam or a print may be a reason to buy new clothes for the textile industry, but in everyday life, 15 minutes of work is often enough.
Knowing a few of these small tricks saves money, reduces textile waste and keeps favourite pieces in everyday use for longer. That is what this bathroom-cupboard trick is about: not turning every old shirt into a museum piece, but simply giving it a few more good outings before it eventually becomes a cleaning rag or upcycling material.



Comments
No comments yet. Be the first to comment!
Leave a Comment