
In brief
- 🧱 Grout is porous, allowing concealed mould to settle within biofilm and limescale. Sprays seldom reach deeply enough on their own, so mechanical agitation is needed to disrupt this barrier.
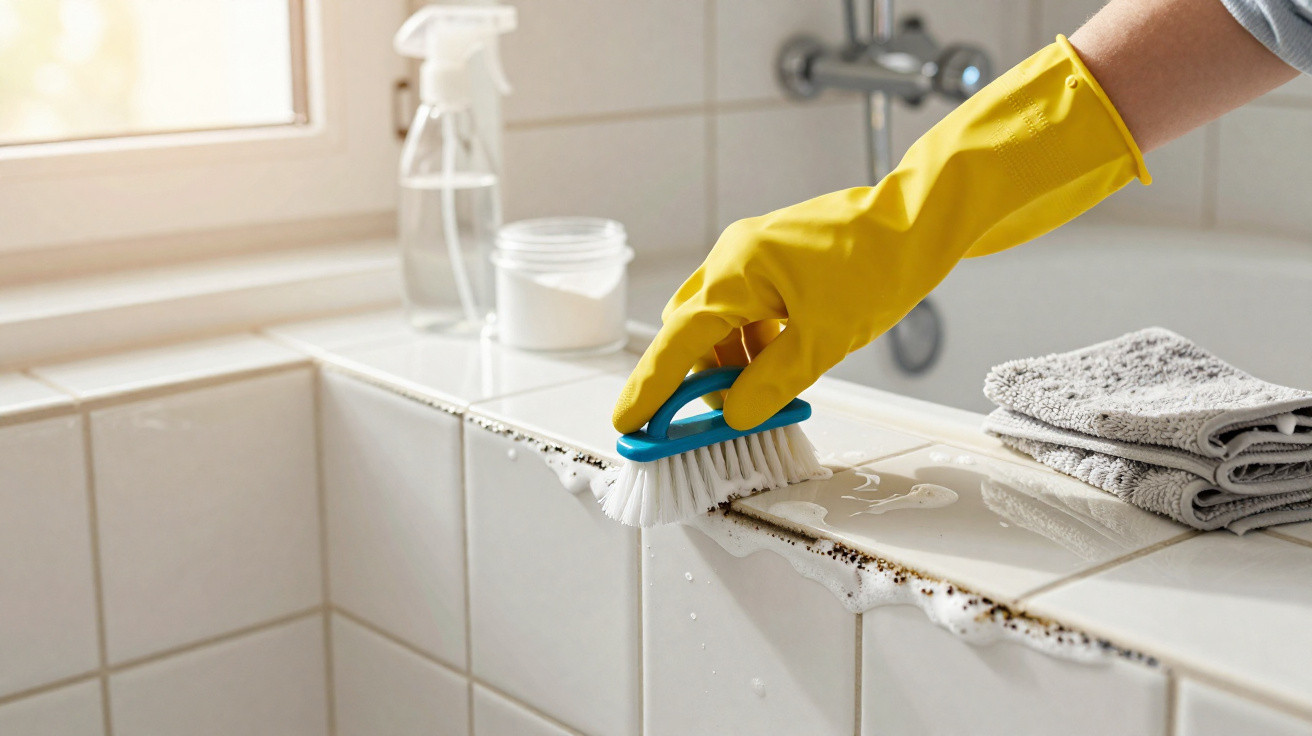
- 🪥 A bath brush applies targeted shear force inside concave joints, rather than gliding over raised tile surfaces like many gadgets. The most effective pairing is a brush and a mild alkaline cleaner.
- 🧪 For a steady scrub: dampen the area first, use a bicarbonate of soda + washing-up liquid paste, leave it for 10–15 minutes, scrub the joints with short strokes, then rinse and dry thoroughly.
- 🌬️ Prevention is crucial: keep the extractor running for 15–20 minutes after showering, use a squeegee and towel to remove water, monitor moisture with a hygrometer, and use a breathable grout sealer each year.
- 🧰 Recognise when DIY has reached its limit: repeat staining, cracks or leaks require professional regrouting. Do not use harsh acids on natural stone, and remember that chemicals without agitation are not a solution.
A subtle change is taking place in UK bathrooms, and it has nothing to do with expensive devices or strong bleach. The unassuming bath brush - a hand-held tool with firm bristles - combines measured pressure with patient strokes to remove dirt lodged in tile joints. When mould takes hold in grout, sprays may lighten the visible surface while leaving its source untouched. A practical trick from a journalist’s notebook, tried in rented flats and family homes, demonstrates that regular, simple scrubbing reaches the minute pores where fungal growth attaches. Here is why grout supports concealed colonies, why a bath brush produces the appropriate force, and how to restore a clean finish without sacrificing your weekend - or irritating your lungs.
Why Grout Provides a Home for Hidden Mould
Rather than being a smooth, sealed surface, grout is a porous blend of sand and cement, sometimes polymer-modified cement, containing microscopic passageways. Through capillary action, these channels draw in water and retain dampness after a shower, even once the exterior appears dry. This is an ideal environment for mould and mildew, which are protected by a sticky biofilm made from soap deposits, skin oils and shampoo polymers. A disinfectant spray may be applied, but the film can behave like clingfilm and restrict how far it penetrates. The outcome is a persistent colony rooted beneath the surface, only becoming apparent when grey discolouration or tiny black spots emerge.
Hard water, common across much of the UK, adds another difficulty. Limescale deposits make the grout surface rougher, creating additional points where spores can settle. Brief, hot showers also create sharp rises in humidity, particularly in compact bathrooms with poor ventilation or ineffective extractors.
This explains why “spray-and-walk-away” cleaning so often disappoints. Cleaning liquids quickly run over tile faces but do not adequately reach dents and concave grout channels. Breaking the attachment between the biofilm and grout requires mechanical agitation: physical action that cuts through the film and exposes the colony to the cleaner. Only friction consistently breaks down that protective coating, so the chemistry can complete the task. Grout is much like carpet pile: a chemical is not a replacement for raking with a brush when dirt has been pressed deep into it. The aim is to use sufficient controlled pressure to clean the joint without damaging the tile glaze.
Why a Bath Brush Is Better Than Gadgets for Deep Grout Cleaning
Tools claiming to transform grout are plentiful, from steam cleaners and powered scrubbers to powerful bleaches. Each can be useful in the right setting, but the bath brush stands out because it creates shear force with precision. A hand-held brush lets you determine its angle, pressure and stroke length, following the concave joint so bristles work inside the channel instead of sliding over it. It enables you to dwell on stained areas, work carefully around silicone and maintain contact long enough to remove biofilm.
Powered rotary attachments, in comparison, often travel over the tile surfaces, treating the high points rather than the recesses. Steam introduces substantial moisture, which may be unsuitable when grout is cracked or unsealed. For the majority of household grout, patient pressure is more effective than fast, showy cleaning.
| Method | Best For | Pros | Cons |
|---|---|---|---|
| Bath brush + mild alkaline paste | Routine deep cleaning of most grout | Inexpensive; accurate control; few fumes | Requires manual work; technique is important |
| Electric scrubber | Large, flat tiled areas | Covers surfaces quickly; reduces fatigue | May miss concave joints; risk of splashing |
| Steam cleaner | Sanitising sealed joints | Chemical-free; heat reaches into surfaces | Adds moisture; unsuitable for cracked grout |
| Chlorine bleach rinse | Quickly whitening light stains | Rapid visible improvement | Fumes; potential colour damage; only affects the surface |
| Oxygen bleach soak | Persistent organic staining | Less harsh than chlorine; works over time | Requires a lengthy dwell; must be rinsed well |
The strongest practical approach combines movement with chemistry: a gentle mild alkaline paste to saponify oils, followed by brushing to release the film. It is this partnership, rather than any single “magic” product, that brings grout back towards its original colour. Resistance felt through the brush handle also tells you when the slimy layer has been cleared and clean grout lies below. That tactile feedback is rarely offered by gadgets.
The Steady-Scrub Bath Brush Method: Step by Step and Science-Backed
Treat the bath brush routine as a short workout where technique matters more than force. Begin by ventilating the room, either by opening a window or switching on the extractor, and wear gloves. Dampen the grout beforehand so it does not draw moisture out of the cleaner. Make a paste using bicarbonate of soda and a small amount of washing-up liquid. The alkaline powder helps release oils, while the surfactants lift away residue. Leave it to dwell for 10–15 minutes, allowing the chemistry to soften the film before brushing.
Next, work in small overlapping movements along each joint. Increase pressure gradually until the drag reduces, which indicates that the film has detached. Rinse regularly to remove the loosened slurry; otherwise, dirt will simply be transferred to another area.
- Wet the tiles and grout first, while maintaining good ventilation.
- Apply the mild alkaline paste and leave it for the required dwell time.
- Brush along each joint rather than across it, using short, controlled strokes.
- Reapply paste where necessary, then rinse and wipe the area to check progress.
- Complete the process with a clean-water rinse and dry using a microfibre cloth.
In my trials in three London bathrooms - including one rented property with greyed joints from years of use - this technique achieved the most consistently even brightening and left the fewest “missed pits” along the grout lines. The hand-held brush also made it easier to clean confined corners without pulling up silicone around the edges. If hard-water limescale remains, use a non-acidic limescale remover suitable for grout. Alternatively, diluted white vinegar can be used only on ceramic or porcelain, kept away from natural stone; vinegar must never be mixed with bleach. Drying is the overlooked final stage: spending a few minutes with a microfibre towel removes the moisture mould needs most.
Prevention, Advantages and Drawbacks, and When to Contact a Professional
After restoring the grout, keep it clean by managing moisture carefully. Run the extractor for 15–20 minutes after showering, and leave the door slightly open to encourage air movement. A fast pass with a squeegee, followed by drying the grout lines with a towel, takes less than two minutes and greatly reduces lingering damp. A small hygrometer can be useful: if humidity remains above 60%, improve ventilation or introduce a compact dehumidifier.
Cement-based grout should be treated annually with a breathable sealer to reduce water absorption. In family bathrooms, add a five-minute weekly brush check to high-splash areas, including around taps, niches and the lower metre of the shower, where biofilm returns most rapidly. Small, frequent abrasion is more effective than occasional heroic cleans.
- Pros: Affordable, low-fume, highly controllable and gentler on finishes.
- Cons: Needs physical effort and some practice; it cannot fix failed grout or leaks.
- Why Chemicals Alone Aren’t Better: They may brighten the surface, but they rarely pass through biofilm without agitation.
It is important to recognise the limits of cleaning. When black mould remains below cracked or missing grout, or staining “bleeds back” within days, there may be water ingress, deteriorated sealant or damage beneath the surface. At that point, professional help is appropriate: regrouting or joint repairs may be needed, potentially after drying work and mould remediation. Avoid DIY acids on natural stone as well; a specialist can select compatible cleaning products. The practical rule is simple: if the structure is compromised, scrubbing is a stopgap, not a solution.
The bath brush approach is not glamorous, yet its effectiveness comes from straightforward physics: friction disrupts biofilm, controlled movements reach narrow crevices, and gentle cleaning chemistry removes what remains. Pair it with disciplined ventilation and a weekly touch-up, and grout can stay bright without bleach fumes or costly gadgets. For many homes, that benefits health, budgets and tiles alike. As you look at your own bathroom this weekend, where will you begin your first ten-minute steady-scrub session, and what minor change could help make it a habit you genuinely maintain?




Comments
No comments yet. Be the first to comment!
Leave a Comment