
After the festive season, many people decide to rearrange pictures, move shelves and rethink their home.
Then they discover an annoying problem on the wall.
The decorations come down, but the plastic wall plugs remain, embedded in the plaster like unwanted reminders. Pulling everything out on impulse can turn an innocent little hole into a crater that is difficult to conceal. With a little technique and a few straightforward precautions, you can remove these plugs, fill the holes and leave the wall ready for a fresh start, without visible marks.
The ‘Swiss cheese’ wall problem
Anyone who has lived in a rented flat will recognise the scene: you take the TV off the wall, dismantle a shelf, remove the curtain bracket… and beneath the paint is a display of old holes, ageing wall plugs and poorly completed repairs.
At this point, many people reach for any old pair of pliers, yank out the plug and hope for the best. In reality, the opposite usually happens: the plaster breaks away around it, paint chips off, the hole gets larger and the ‘quick fix’ turns into a full masonry repair.
“The wall’s biggest enemy is not the drill, but the rush to undo what was installed.”
Why you should not yank out a wall plug
Wall plugs are specifically designed not to come out easily. On solid-wall versions, small catches hold the plastic inside the hole. With plasterboard fittings, the body expands behind the board, forming a type of anchor.
When you pull forcefully, the plug’s resistance overcomes the plaster rather than the other way round. Plaster, lightweight clay block or more fragile concrete breaks around it, and the damage spreads into a cone shape that is much wider than the drill hole was originally.
The result is more filler to apply, longer drying time, greater difficulty levelling the area and a larger section to repaint.
The screw-and-pliers technique: wall surgery
There is a far more controlled way to remove a wall plug, using simple tools that almost everyone has at home: a screw and tweezers or pliers.
Basic tools for a clean job
- A screw compatible with the diameter of the wall plug
- Fine-pointed tweezers or needle-nose pliers
- A filling knife or decorator’s knife
- Repair filler or plaster (ready-mixed or powdered)
- Fine sandpaper (120 or 180 grit)
- A piece of cardboard or thin wood to protect the wall
With this simple kit, the task stops being one of ‘brute force’ and becomes almost like watchmaking.
Step 1: make a ‘handle’ on the wall plug
The first step is to restore something to grip on that old plug. If its rim has been cut flush with the wall, there is nothing to hold. The answer is to partially screw a screw into the centre of the hole, by 1 to 2 centimetres.
This screw acts as a firm hook. Rather than pulling on fragile plastic, you work with metal, which withstands the pulling force and the small movements needed to release the plug.
Step 2: use leverage, not a sudden pull
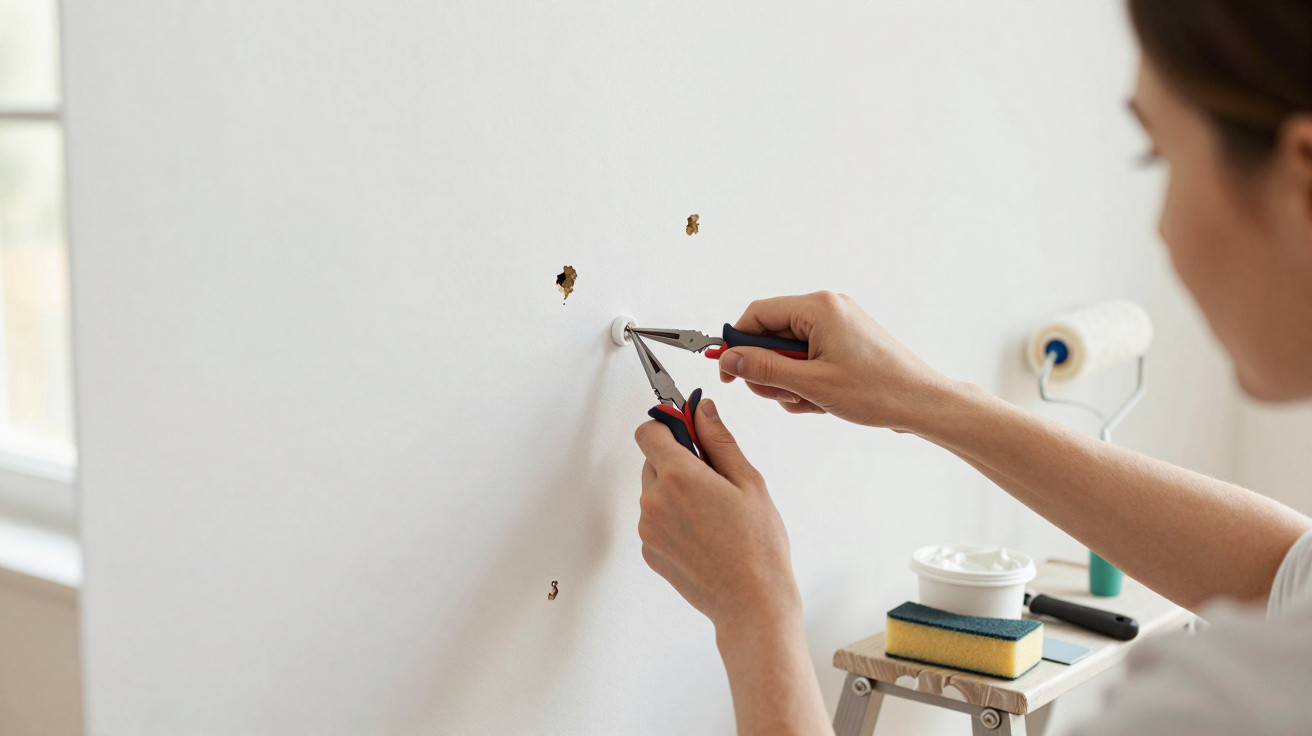
Once the screw is in place, grip its head with tweezers or pliers. Instead of pulling straight forwards with all your strength, use a controlled movement based on the principle of leverage.
“Short, gentle rocking movements release the wall plug without damaging the plaster around it.”
Rest the tool against a piece of cardboard or thin wood so that you do not mark the paint, then use this support as your fulcrum. Alternate the movements from side to side while applying steady but moderate pulling pressure.
In most cases, the plug will begin to move out, millimetre by millimetre, until it comes out whole. The hole will remain almost the same diameter as the original, ready for filler.
How to fill the hole without leaving a raised patch
Once the wall plug has been removed, it is time to turn that clean hole back into a flat surface ready for painting. This is where many DIY repairs go wrong: too little filler, poor application, excessive sanding and a patch that shows up under side lighting.
Choosing the right type of filler
For holes left by ordinary wall plugs, ready-mixed paste fillers generally work well, are easy to use and dry quickly. For larger holes, or when plaster has come away around the opening, powdered products that set through a chemical reaction generally shrink less and provide greater strength.
| Hole size | Recommended product | Main advantage |
|---|---|---|
| Small holes (standard wall plug) | Ready-mixed paste filler | Straightforward, quick application |
| Medium-sized or uneven holes | Powdered plaster/render repair filler | Less shrinkage when drying |
| Very damaged areas | Mortar or reinforced plaster | Greater mechanical strength |
Application: controlled excess is your friend
Use the filling knife to press the filler into the hole, making sure it reaches the bottom. Hidden air bubbles become tiny dips once the material has dried.
Leave the filler sitting slightly proud of the wall, creating a small raised area. This excess will be levelled during sanding, ensuring it lines up perfectly with the original surface.
“A slight excess of filler is easier to correct than a shallow repair that needs another application.”
Move the filling knife in crossing horizontal and vertical strokes to bring the repaired section level with the rest of the wall and create a more even initial finish.
The final secret: sand and paint without revealing the repair
After the drying time specified by the manufacturer, it is time to make the patch disappear both visually and to the touch.
Gentle sanding, checked by touch
Using fine sandpaper, make light circular movements. The aim is simply to level the raised filler with the wall, without sanding too deeply. Every few seconds, stop and run your hand over it.
Touch often detects unevenness that the eye misses. When you can no longer feel the transition between the repaired area and the original wall, the spot is ready for paint.
Feathered painting to avoid a ‘square patch’
If you still have the same type and colour of paint, that is the best-case scenario. With a small roller or soft brush, apply a small amount over the repaired spot and then immediately blend it outwards using increasingly light, broad strokes.
This soft transition produces an almost unnoticeable gradient between new and old paint. Anyone who does not know where the hole was will struggle to spot the repair once it has dried.
“The trick is not to hide the hole, but to disguise the edge of the new paint.”
When to fill a hole, and when to reuse it
Not every hole needs to be written off. In some cases, reusing the existing fixing point may be more worthwhile than filling it and drilling another one right beside it.
- The hole is sound, with no signs of loose plaster
- The new item will be positioned in the same area
- The wall plug is still in good condition, or can be replaced with one of the same diameter
To reuse it, simply check that the wall plug is firmly secured and use a screw appropriate for the load type. For heavy shelves and TV brackets, it is worth checking the weight limit stated by the wall-plug manufacturer.
The risks of makeshift fixes and common bodges
Several popular shortcuts can prove costly over time. Improvised materials such as toothpaste, soap or paper with glue may look convincing for a few days, but they tend to crack, shrink, collect dirt or come loose.
Another risk is applying filler over dust or flaking paint. This compromises adhesion, and the whole patch may fall away months later, exposing the hole again, sometimes even larger than before.
How to plan your décor with removal already in mind
One helpful strategy for people who change their décor regularly is to group holes along the same height line, particularly in focal areas such as behind the sofa or on the TV wall. New pictures or shelves can then usually cover the previous fixing points.
Another practical option is to use rails, tracks or boards fixed with fewer anchor points, allowing several items to be hung without multiplying holes across the entire wall.
For renters, mastering this wall-plug removal and hole-filling technique becomes almost a negotiating tool: a smooth, well-maintained wall reduces the risk of deductions from the tenancy deposit and makes the end-of-tenancy inspection easier.






Comments
No comments yet. Be the first to comment!
Leave a Comment