
The bathroom wall is spotless, the grout lines are clean, and all that is missing is a simple towel rail. Then comes the thought that can discourage even the keenest DIYer: drilling into the tiles. We all know that moment when the drill suddenly feels far too powerful and you can already picture a crack spreading to the edge of the wall tile. Yet tiles do not break without reason. They respond to the wrong movement, excessive pressure or a tool selected in haste. There is no magic trick: the key is mainly knowing when to slow down. Even a person who has never used a drill can make a neat, clean and surprisingly reassuring hole. The first few seconds are what matter most.
Before drilling, your tiles offer a few clues
In a kitchen or bathroom, no two tiles are quite alike, even if they are the same colour. Wall tiles, which are often softer, are relatively easy to drill; dense, extremely hard porcelain stoneware requires more patience. First, look closely at the finish: glossy, very smooth, matt or slightly textured. This detail matters because the drill bit may skid before it even begins cutting. The right tool therefore does more than save time: it prevents the small slip that can leave an unsightly scratch visible every morning.
A neighbour once described trying to mount a mirror above his basin on a Sunday afternoon. He marked the spot in pencil, used an ordinary drill bit and pressed hard: on his second attempt, the tile cracked in a star pattern. Repairing it cost far more than the towel rail he had originally intended to fit. Professionals say that a tile can fail very quickly when exposed to a sharp vibration or too much concentrated pressure. The face of the material is strong, but it does not tolerate poorly directed impacts. A 6-millimetre hole can sometimes take five minutes. In the end, that is not very long.
The principle is straightforward: tiles should be gradually abraded, rather than struck like a concrete wall. Hammer mode, which is useful for brick or concrete block, creates exactly the micro-impacts that weaken both the glaze and the tile itself. So it must be avoided at the start. Successful tile drilling is less a show of strength than a calm, consistent action. Let us be honest: nobody really does this every day. Spending two minutes identifying the tile type and getting the equipment ready remains the best way to prevent a minor household disaster.
A simple tile-drilling method that prevents cracks, even for beginners
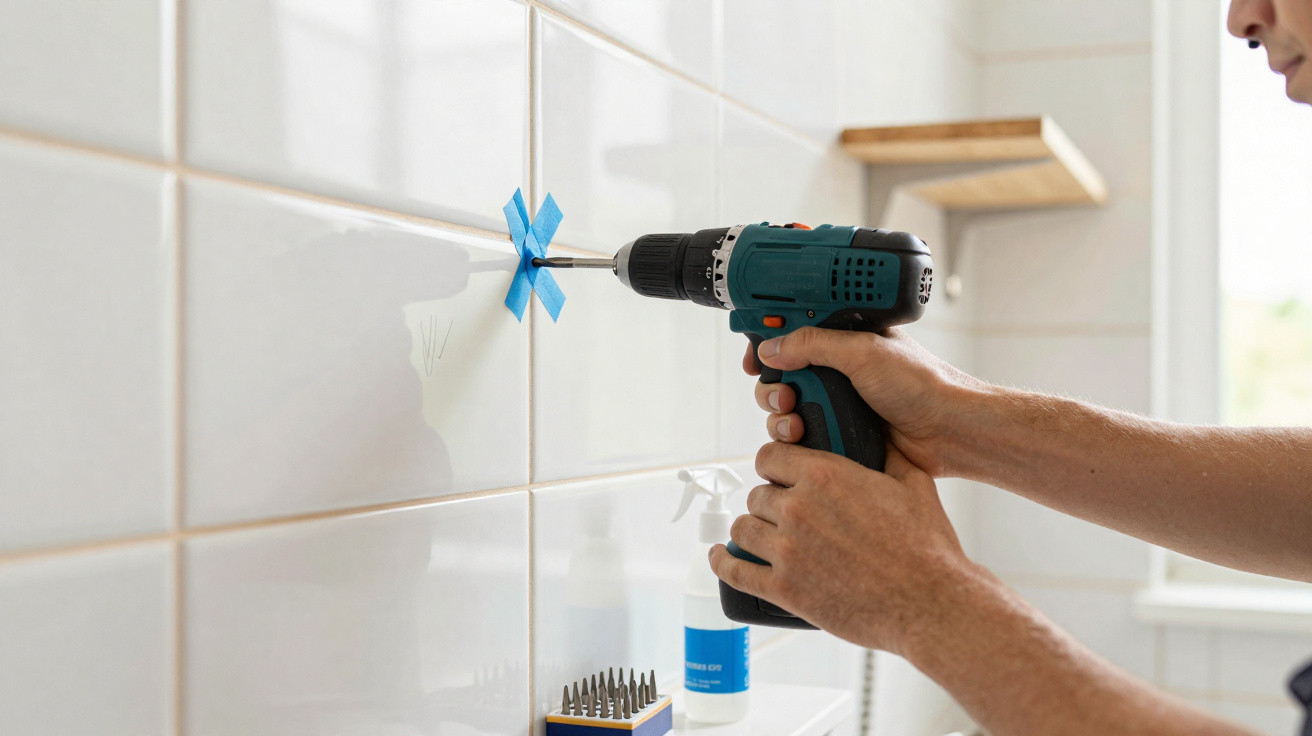
Start by applying two strips of masking tape in a cross over the exact drilling point. The tape gives the drill bit grip and lets you mark a visible guide without scratching the surface. Next, use a tile drill bit or a diamond drill bit, depending on the hardness of the covering, with the drill set to a low speed. Hold the tip exactly perpendicular to the wall, then begin without applying force. Keep the movement steady and almost light. Once you have gone through the glaze, you will often feel the resistance change. This is where many people speed up. It is better to maintain the same pace.
The most common mistake is summed up in a phrase heard time and again: “It is not going in, so I will press a bit harder.” That is exactly when the tile may break. The drill should do the work for you; your hand is there chiefly to guide it. If the bit gets hot, pause for a few seconds and lightly dampen the area with a sponge, without soaking the drill. On particularly hard tiles, a little water reduces overheating and extends the life of the bit. Do not worry if progress seems slow: steady advancement is usually a sign that everything is going as it should.
After drilling through the tile, you can switch bits to suit the material behind it: concrete, brick, plasterboard or a hollow partition wall. Keep hammer mode off until you are completely through the tile, then turn it on only if the wall requires it. A tiler often sums up this rule with a particularly apt phrase:
“You do not drill a tile; you give it time to open up.”
- Check that there are no pipes or electrical cables before starting.
- Apply masking tape to stop the drill bit from slipping.
- Drill slowly, without hammer mode on the tiled surface.
- Use a wall plug suited to the wall, not merely to the hole diameter.
The real secret: do less, but do it at the right time
A clean hole in a tile brings an unexpectedly satisfying feeling. It is not only about DIY: it is the quiet pleasure of fitting that shelf, mirror or coat hook without damaging a room you enjoy. The right approach is still to prepare the drilling point, check what lies behind the wall and refuse to rush. A cracked tile bears the mark of an impatient action for a long time. By contrast, a properly installed fixing becomes almost invisible. It holds firm, does its job, and eventually makes you forget the anxiety that came before it.
There are also times when drilling is not the best solution. For a small, lightweight accessory, good-quality adhesive fixings can remove all risk, provided the surface is perfectly clean and dry. An old splashback, tiles that are already cracked, or an area near a water supply all call for extra care. Asking a tradesperson for advice is not an admission of failure. It may even save an entire wall. Patience, in this situation, always costs less than replacing tiles that can no longer be found.
What is most interesting is that this technique also changes how you view small jobs around the home. You realise that the difficulty is not necessarily where you expected it: it is not the drill itself that feels intimidating, but the prospect of getting it wrong. With a suitable drill bit, moderate speed and a few moments of concentration, drilling tiles becomes an accessible task. Perhaps this first hole will lead to other projects that seemed harder than they were: a shelf in the shower, a wall-mounted holder in the hallway, or at last the mirror that has spent months leaning against the wall.
| Key point | Detail | Added value for the reader |
|---|---|---|
| Choose the right drill bit | A tile drill bit for wall tiles, or a diamond drill bit for very hard porcelain stoneware. | Reduces the risk of slipping, overheating and cracking from the outset. |
| Avoid hammer mode | Keep hammer mode switched off until the tile has been fully drilled through. | Protects the glaze and prevents harsh vibrations from breaking the covering. |
| Proceed without force | Use low speed, light pressure and pauses if the drill bit heats up or resistance increases. | Produces a neat, long-lasting hole suited to the chosen fixing. |




Comments
No comments yet. Be the first to comment!
Leave a Comment