
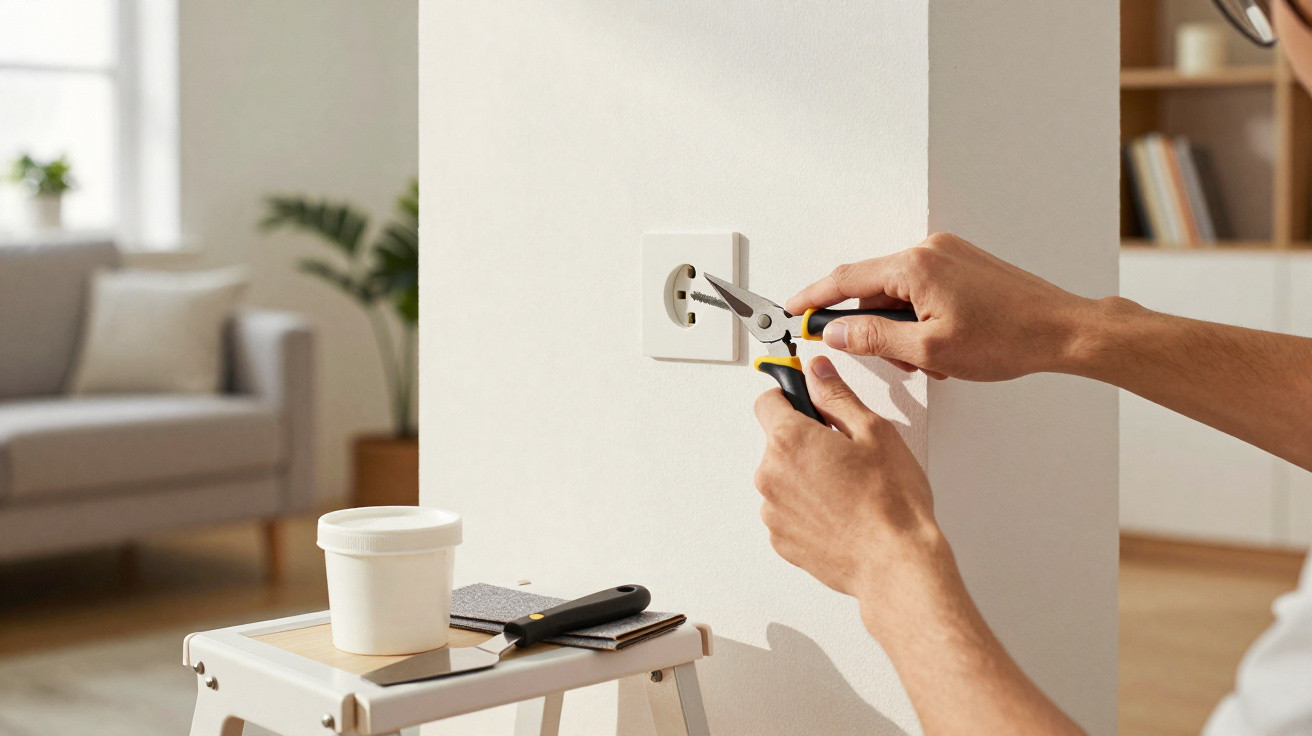
Many people reach for pliers in this situation, wrench the plastic wall plug out of the wall by force and are then left with something resembling a small crater. With a systematic approach, however, the wall can be restored with virtually no trace. A simple levering technique, suitable filler and a little patience can make even old drilled holes disappear so completely that nobody will find them later.
Why pulling sharply can tear up the wall
A wall plug is designed to grip firmly. Whether it is a metal hollow-wall fixing in plasterboard or a conventional plastic wall plug in masonry, its primary function is to resist being pulled out. That is precisely why brute force almost always causes damage to the wall.
When someone grips the edge of the wall plug with combination pliers and simply pulls outwards, this is what happens: brittle plaster breaks away, paint flakes off with it, and a six-millimetre hole becomes an area of damage several centimetres across. Plaster and old paint finishes are particularly vulnerable.
“Anyone removing wall plugs with brute force is not fighting plastic alone, but the structure of the entire wall.”
Many walls have also been painted several times, contain fine hairline cracks or have slight unevenness. Every unnecessary jolt makes the damage worse. It is therefore worth using a method that loosens the wall plug rather than ripping it out aggressively.
The small wall plug tool kit: all you need
A clean, controlled job requires only straightforward standard tools that most households already have. There is no need for specialist systems from the DIY shop.
- a screw with a matching or slightly smaller diameter
- flat-nose pliers or water-pump pliers
- a screwdriver suitable for the chosen screw
- a filling knife or painter’s knife
- wall filler (ready-mixed filler or powder to mix)
- 120–180 grit sandpaper
A small piece of wood or a strip of cardboard can also be useful for protecting the plaster from pressure marks caused by the pliers.
The lever trick: remove wall plugs without damaging the wall
The key to gentle removal is the lever principle. Rather than struggling with the exposed wall plug itself, first create a secure “handle”.
Create the ideal grip with a screwed-in screw
First, screw a suitable screw into the wall plug. It can be shorter than the depth of the hole. Leave the screw head clearly protruding from the wall; a screw-in depth of one to two centimetres is usually entirely sufficient.
This gives the wall plug a secure metal anchor. Crumbling plastic edges or rims cut flush with the wall no longer matter. The screw transfers every movement directly to the wall plug.
Use gentle rocking movements instead of forceful pulling
Next, position the pliers. Grip the screw head firmly, then avoid one large tug and use a combination of careful rocking movements and gentle pulling instead.
In practice, proceed as follows:
- grip the screw head with the pliers
- tilt it slightly left and right, then pull very gently
- once the wall plug starts to loosen, repeat the movement and increase the leverage
- if necessary, use the curved part of the pliers or a wooden strip as a support for controlled levering
This action gradually releases the wall plug from the hole without tearing away the plaster. The remaining hole is generally only marginally larger than the original drilling diameter and retains neat edges, making it ideal for filling.
Fill the hole neatly so it stays invisible
Once the wall plug has been removed, the bare hole is exposed. At this point, the quality of the repair determines whether the result is a barely noticeable mark or an obvious scar.
Choosing the right filler for each hole
For standard wall-plug holes of up to about ten millimetres, ready-mixed filler from a tube works very well. It can be applied directly from the opening with a filling knife, holds its shape and dries relatively quickly.
For larger cavities, ready-mixed filler is often insufficient. Powder filler mixed with water is the better option here. It hardens chemically, shrinks less and provides reliable coverage even for deeper areas of damage.
“Keep away from toothpaste and improvised mixtures of soap, chalk or paper – they crack, discolour and will stand out unpleasantly at the latest when the wall is next painted.”
Apply the filler properly: slightly too much is better than too little
Press the filler firmly into the hole using the edge of the filling knife. The aim is to force out every air bubble. Small twisting movements and gently drawing the knife back and forth help push the material deep into the cavity.
Then smooth the surface roughly, but deliberately allow the filler to sit slightly proud. A small bump of one to two millimetres is not a problem at first, as sanding will remove it. If too little is applied, the area will sink as it dries and leave a visible hollow again.
The finishing touch: from raised filler to a flawless surface
Depending on the depth of the hole and the product used, the filler needs between two and 24 hours to dry fully. Only then is it worth reaching for the sandpaper.
Match the original wall texture with a light touch
Work the area in circular motions with fine sandpaper. The goal is to reduce the small raised section until the surface is perfectly level. Short, light movements are enough; excessive pressure can scratch the surrounding paint or create new dips.
The best check is not visual, but tactile. When you run your palm over the repair with your eyes closed, you should not feel any transition. The wall should feel seamless, with no step and no hard edge.
Blend the paint instead of creating a colour patch
The final stage is where many repairs become noticeable: painting. Ideally, some of the original wall paint remains available. If not, the only solution is to find the closest possible shade at a DIY shop.
To prevent a visible “patch”, a blending technique has proved effective:
- load the brush or mini roller with only a small amount of paint
- paint directly over the filled area first
- gradually feather the paint outwards in an increasingly thinner layer
- avoid hard edges and clearly defined rectangles while painting
This creates a soft transition over the existing paint layer. Once everything has dried, the repaired area looks like part of the original paint finish, with no visible edge.
How many holes can be treated this way – and what are the limits?
Once you begin, you quickly realise that even a whole collection of wall plugs behind an old shelf can be repaired in an afternoon. Several holes can be filled, sanded and painted in one session.
The method has its limits with heavily damp walls or crumbly old plaster that falls away even when tapped lightly. In these cases, a larger repair section is more sensible, and sometimes the entire plaster layer may need replacing.
Practical tips for avoiding common mistakes
- Never pull directly on a bare wall plug; always screw in a screw first.
- Lever particularly carefully with plasterboard, as the board is more delicate than solid brick.
- Apply filler in two thin layers if the hole is very deep.
- Before painting, remove dust with a lightly damp cloth, otherwise the paint will adhere poorly.
- On textured walls, such as woodchip wallpaper, imitate the surface texture slightly when filling rather than making it completely smooth.
Following these points gives you considerably more freedom when arranging your home. Shelves can be moved, picture walls can appear and disappear again, without every change leaving visible marks in the plaster.
In rented homes especially, removing wall plugs neatly can save real money. When you move out, many landlords count every visible mark on the wall, particularly poorly filled holes or large broken-out areas. Using the technique described keeps the wall close to its original condition and makes any discussion about redecoration costs much less stressful.
If you are unsure, practise first in an inconspicuous area, such as behind a cupboard. After one or two attempts, the technique becomes surprisingly easy. What may seem like the problem of “wall-plug holes” then becomes a minor task that can be dealt with while redecorating.





Comments
No comments yet. Be the first to comment!
Leave a Comment